Pro Tips for Making This Kung Pao Cauliflower
Achieving that perfect balance of crispy cauliflower and a glossy, flavorful sauce is an art, but with a few of my tried-and-true tips, you’ll master this Kung Pao Cauliflower in no time! I always find that a little extra care in the kitchen makes all the difference.
My Secret Trick: For truly crispy cauliflower, toss it thoroughly with the cornstarch and make sure not to overcrowd your pan when frying. This allows each piece to get beautifully golden and crunchy, just like my grandmother taught me to achieve the perfect crisp on a pie crust – patience is key!
When preparing the sauce, take a moment to whisk all the ingredients together until completely smooth. This ensures a consistent flavor and prevents any lumps, much like ensuring your cake batter is perfectly smooth for an even bake.
Don’t be afraid to adjust the spice level to your liking! I often add a little extra sriracha or chili garlic sauce if I’m feeling adventurous, or a touch less if I want a milder experience for the little ones. It’s all about making this Kung Pao Cauliflower your own.
Finally, serve it immediately! The best way to enjoy this dish is when the cauliflower is at its crispiest and the sauce is wonderfully warm and clinging to every bite. Trust me, it’s worth the instant gratification.
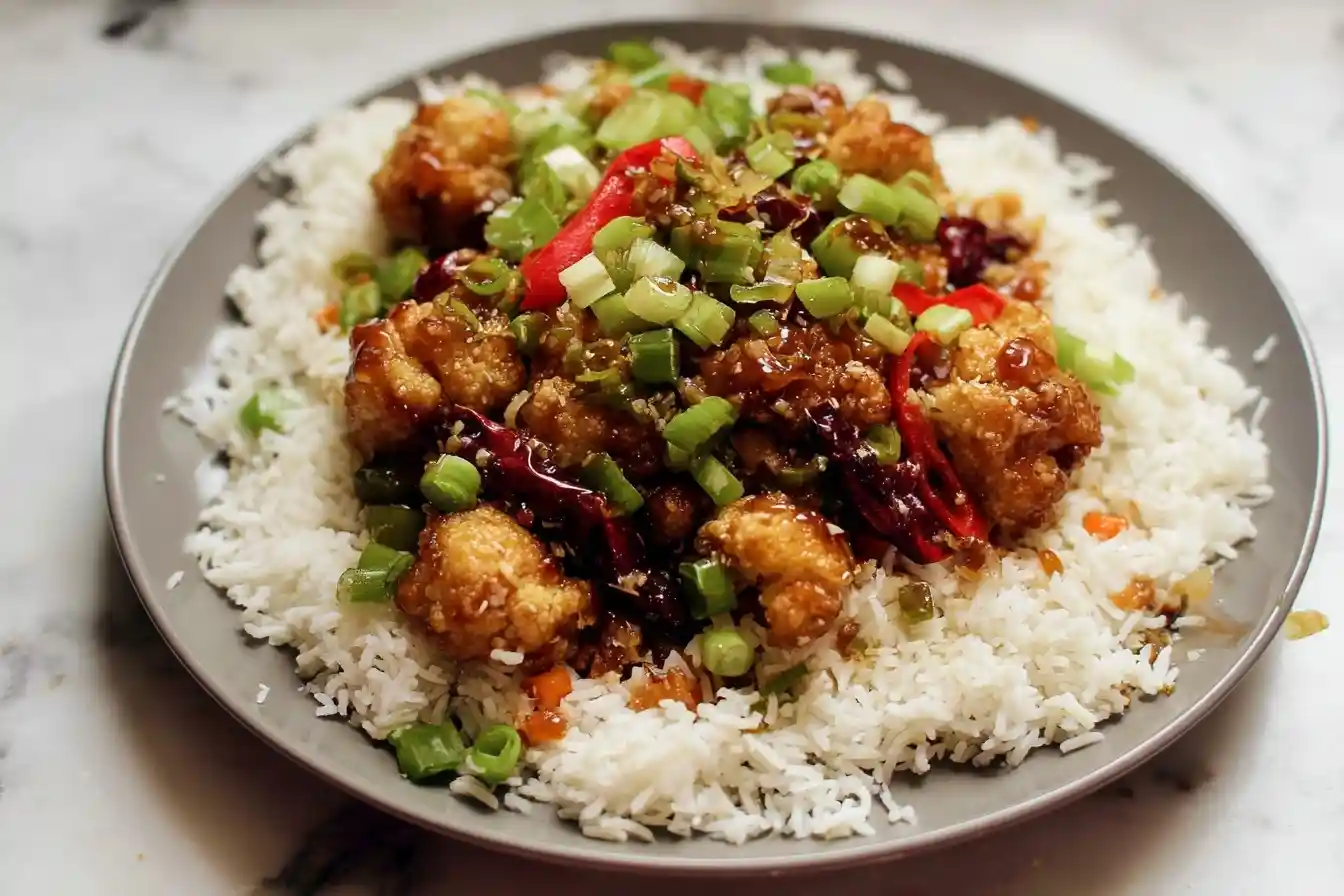
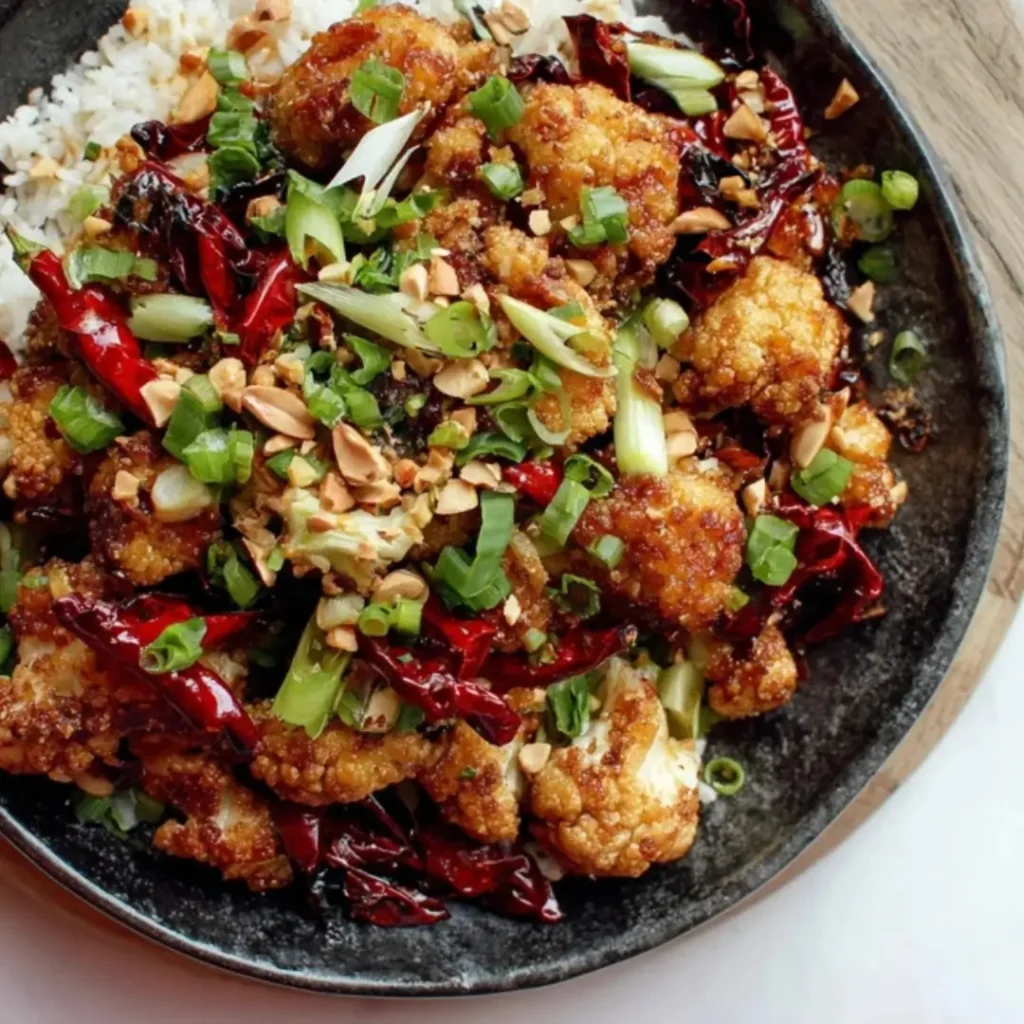
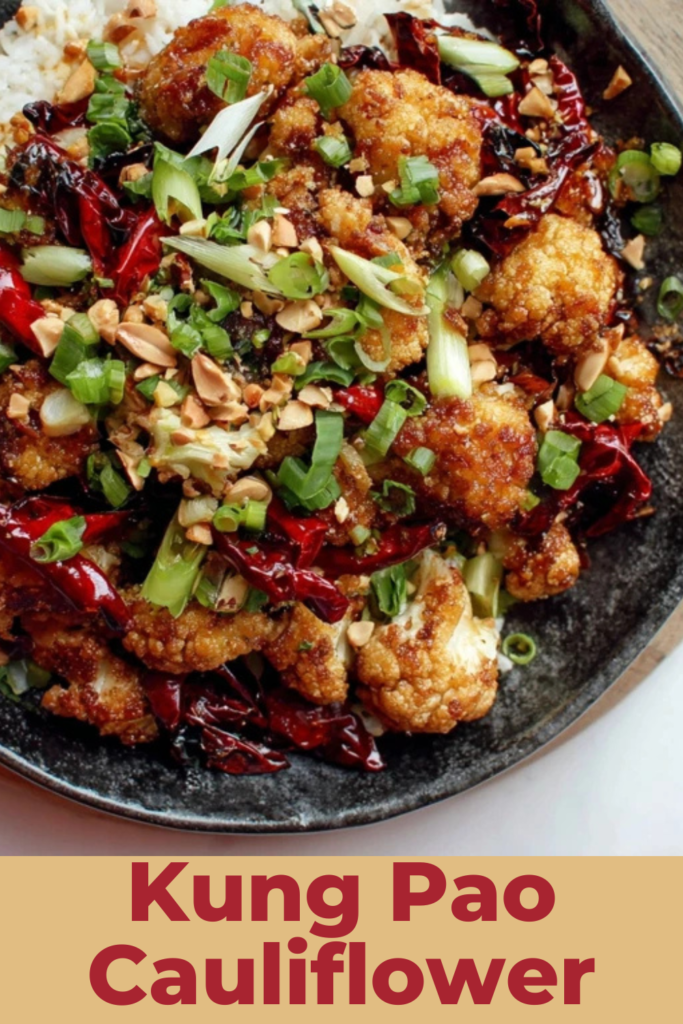
Kung Pao Cauliflower
Ingredients
Equipment
Method
- Preheat your air fryer to 400°F (200°C). If using an oven, preheat to 400°F (200°C).
- In a large mixing bowl, toss the dried cauliflower florets with 2 tbsp cornstarch, 1 tbsp neutral oil, 1/2 tsp salt, and 1/4 tsp black pepper until evenly coated.
- Place the coated cauliflower in a single layer in the air fryer basket (you may need to work in 2-3 batches to avoid overcrowding). Air fry for 15-20 minutes, shaking the basket vigorously halfway through, until the cauliflower is tender-crisp and lightly browned. (If using an oven, spread on a baking sheet and roast for 25-30 minutes, flipping halfway).
- While the cauliflower cooks, prepare the sauce. In a small bowl, whisk together soy sauce, black vinegar, hoisin sauce, brown sugar, 1 tsp cornstarch, vegetable broth, sesame oil, and sriracha until smooth. Set aside.
- Heat 1 tbsp neutral oil in a large wok or skillet over medium-high heat.
- Add the dried red chilies and stir-fry for 30 seconds until fragrant (be careful not to burn them).
- Add the minced garlic and grated ginger to the wok. Stir-fry for another 30 seconds until aromatic.
- Add the diced red and green bell peppers and the white parts of the green onions. Stir-fry for 2-3 minutes until the peppers are slightly tender-crisp.
- Give the prepared Kung Pao sauce a quick stir, then pour it into the wok. Bring to a simmer, stirring constantly, until the sauce thickens (about 1-2 minutes).
- Add the air-fried crispy cauliflower florets and roasted peanuts to the wok. Toss gently to coat everything evenly in the rich Kung Pao sauce.
- Remove from heat. Garnish with the green parts of the sliced green onions. Serve immediately with steamed rice or quinoa.
Notes
Fun Variations for Kung Pao Cauliflower
One of the joys of cooking is making a recipe truly your own, and this Kung Pao Cauliflower is wonderfully adaptable. Think of it like adding your favorite sprinkles to a classic cookie – a little twist can make it sing!
Add a Protein Punch
While the cauliflower is the star, you can easily add some extra protein. My sister loves when I toss in some pan-fried tofu cubes or even a handful of chickpeas for a heartier meal. They soak up the sauce beautifully and add a lovely texture contrast.
Veggie Delight
Feel free to sneak in more vegetables! Sliced carrots, snow peas, or even some blanched broccoli florets would be a fantastic addition. Just make sure to add them towards the end so they retain a bit of their crunch. A friend of mine always adds water chestnuts for an extra layer of crispness!
Nutty Nuances
While roasted peanuts are traditional, don’t shy away from other nuts. Cashews or even a sprinkle of toasted sesame seeds can bring a different nutty depth to your Kung Pao Cauliflower.
Sweet & Spicy Harmony
If you enjoy a little more sweetness, a tiny drizzle of maple syrup or agave nectar can complement the savory and spicy notes of the sauce. It’s a delicate balance, but a delightful one!
What to Serve With Kung Pao Cauliflower
This vibrant Kung Pao Cauliflower is a meal in itself, but it truly shines when paired with a few thoughtful companions. Just like a dollop of fresh cream on a warm fruit crisp, the right accompaniment can elevate the entire experience!
I absolutely adore serving this with a fluffy bed of jasmine rice. The mildness of the rice perfectly balances the bold flavors of the cauliflower, creating a comforting and satisfying meal.
For a lighter touch, a simple side of steamed greens like bok choy or spinach with a dash of sesame oil makes a wonderful addition. It adds a lovely freshness and vibrant color to the plate. My mom always pairs it with a light, crisp cucumber salad, which offers a refreshing counterpoint to the richness of the sauce. And if you’re looking for a quick serving idea, a sprinkle of extra roasted peanuts and fresh green onions right before serving adds both crunch and a pop of color that always impresses!
How to Store Kung Pao Cauliflower
After all the love poured into making your delicious Kung Pao Cauliflower, knowing how to store it properly ensures you can savor every last bite. Just like carefully wrapping up leftover cake to keep it moist, a little attention to storage will maintain its wonderful flavors and textures.
For best results, store any leftover Kung Pao Cauliflower in an airtight container in the refrigerator for up to 3-4 days. While the cauliflower might lose a tiny bit of its crispness, the flavors will have a chance to meld even further, often tasting even better the next day!
When you’re ready to enjoy it again, I recommend reheating it gently in a skillet over medium heat, or in the oven, until warmed through. This helps to re-crisp the cauliflower slightly. My personal tip? A quick toss in a hot pan can revive that delightful texture, and a fresh sprinkle of green onions after reheating brings it back to life. I like storing dishes like this in glass containers; they seem to keep the flavors brighter.
Nutritional Benefits
This delightful Kung Pao Cauliflower offers more than just incredible taste; it’s packed with goodness too! Cauliflower is a fantastic source of fiber and vitamins, while the fresh ginger and garlic bring their own wholesome properties. It’s a wonderful example of how we can create a dish that’s both satisfying and nourishing, embodying my philosophy of combining indulgence with simple, wholesome ingredients from the garden.
FAQs
Faq 1
Can I make Kung Pao Cauliflower gluten-free?
Absolutely! Simply swap out the soy sauce for a gluten-free tamari and ensure your hoisin sauce is also gluten-free. The rest of the ingredients are naturally free of gluten, making it an easy adjustment.
Faq 2
How spicy is this Kung Pao Cauliflower recipe?
The spice level is quite adaptable! The recipe provides a moderate kick, but you can easily increase or decrease the sriracha or chili garlic sauce to suit your preference. Always taste and adjust!
Faq 3
Can I prepare the sauce in advance?
Yes, you can! Whisk together all the sauce ingredients and store them in an airtight container in the refrigerator for up to 3 days. This makes assembly even quicker when you’re ready to cook your Kung Pao Cauliflower.
Faq 4
What kind of oil is best for crisping the cauliflower?
I recommend a neutral oil with a high smoke point, such as vegetable oil, canola oil, or grapeseed oil. This ensures your cauliflower gets beautifully crispy without imparting any unwanted flavors.
Conclusion
There’s such immense joy in creating something delicious with your own hands, especially when it brings such vibrant flavors and textures to the table. This Kung Pao Cauliflower recipe is more than just a meal; it’s an invitation to embrace the warmth and magic of homemade cooking. It’s a dish that truly creates memories, just like those cherished afternoons in my grandmother’s kitchen. So, gather your ingredients, put on your favorite apron, and delight in the process. I promise, with a little love and patience, you’ll create a dish that’s not only better than takeout but also filled with your own special touch. Happy cooking, my dears!