
Oh, sweet friends, isn’t there something truly magical about a dessert that instantly transports you back to simpler times? This orange creamsicle pie is exactly that — a sun-kissed, creamy dream that evokes memories of long summer days and the joyful jingle of the ice cream truck. It’s a symphony of bright citrus and velvety cream, all nestled in a buttery graham cracker crust, a true celebration of those classic orange creamsicle flavors we adore.
I remember distinctly, one sweltering July afternoon, trying to recreate that creamsicle magic in my grandmother’s kitchen. She’d always say, “Sara, the best desserts are made with heart and a little bit of sunshine!” We experimented with orange zest and cool creams, laughter echoing as we tasted our way to perfection. It’s moments like those that fuel my passion for sharing easy, delightful recipes.
This no-bake wonder is not only incredibly simple to prepare, making it perfect for bakers of all skill levels, but it’s also an absolute showstopper for any gathering, big or small. You’ll find that the secret to its effortless charm lies in allowing it ample time to chill; patience truly makes this pie sing!
What You Need to Make This Recipe
Crafting this delightful dessert relies on a few simple stars: the zesty fresh orange juice and zest for that vibrant creamsicle flavor, rich cream cheese and sweetened condensed milk for ultimate creaminess, and crunchy graham cracker crumbs for the perfect base. I always suggest using fresh ingredients; they truly make all the difference in a no-bake orange creamsicle pie. You’ll find the complete list of ingredients and precise measurements in the recipe card below.
How to Make orange creamsicle pie
Whipping up this delightful orange creamsicle pie is a breeze, truly. You’ll start by pressing a simple graham cracker crust into your pie plate, a quick ten-minute bake to set it just right. Then, it’s all about creating that luscious, dreamy orange creamsicle filling by blending softened cream cheese, condensed milk, vibrant orange zest, and a splash of fresh juice until smooth. Once your filling is perfectly creamy, pour it into the cooled crust and let it chill until firm, finishing with a cloud of whipped cream just before serving.
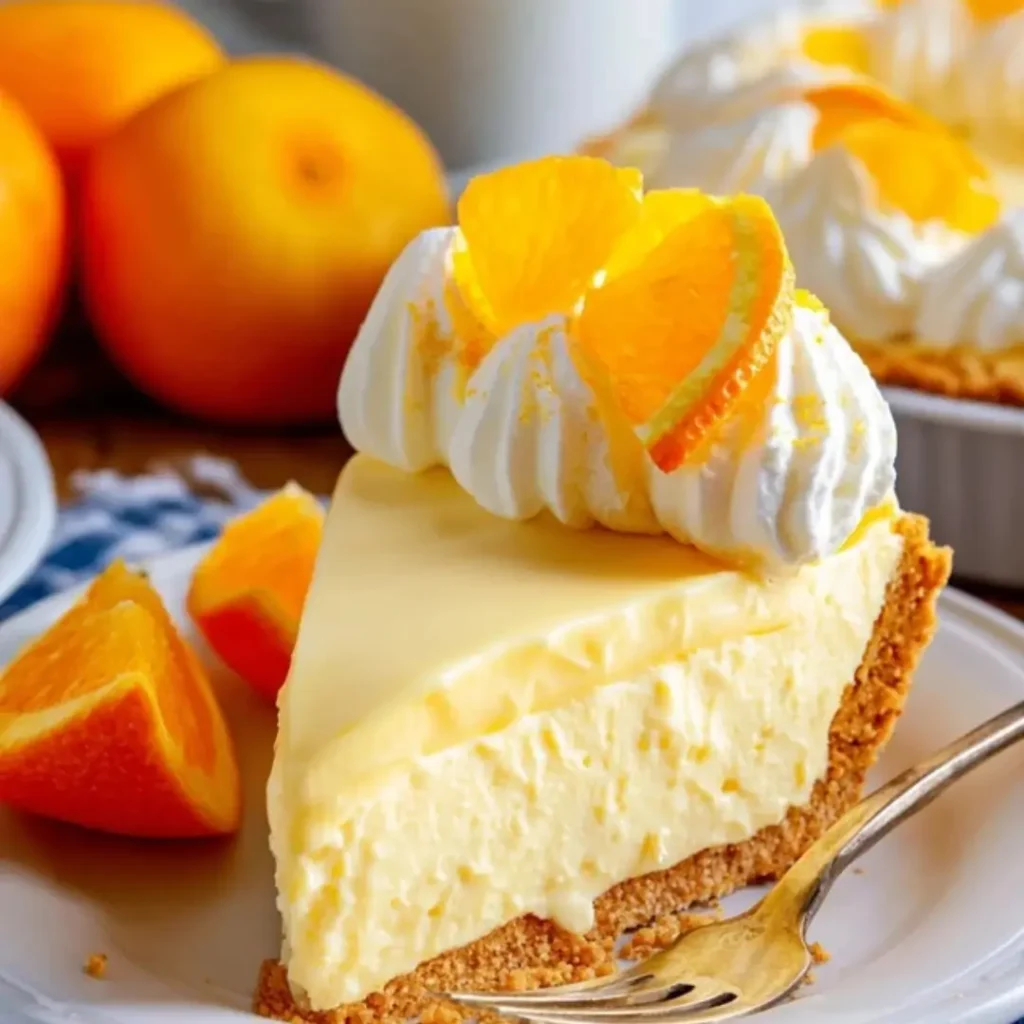
![A slice of {{ $('Fetch Recipe Data').first().json["Main Keyword"] }} topped with whipped cream.](https://tastytablekitchen.com/wp-content/uploads/2026/04/orange-creamsicle-pie-.webp)
Creamy Orange Creamsicle Pie
Ingredients
Equipment
Method
- Preheat your oven to 350°F (175°C). In a medium bowl, combine the graham cracker crumbs and granulated sugar. Pour in the melted butter and mix until the crumbs are evenly moistened and resemble wet sand.
- Press the mixture firmly and evenly into the bottom and up the sides of a 9-inch pie plate. You can use the bottom of a flat glass or measuring cup to help compact the crust. Bake for 8-10 minutes, or until lightly golden. Remove from oven and let cool completely on a wire rack while you prepare the filling.
- In a large mixing bowl, using an electric mixer, beat the softened cream cheese and powdered sugar until smooth and creamy, about 2-3 minutes. Scrape down the sides of the bowl as needed.
- Add the sweetened condensed milk, fresh orange juice, orange zest, and vanilla extract to the cream cheese mixture. Beat on low speed until just combined, then increase to medium and beat until smooth and well incorporated. If using, add 2-3 drops of orange food coloring and mix until desired color is achieved.
- In a separate clean, cold bowl, pour the cold heavy cream. Using an electric mixer, beat on high speed until stiff peaks form. This will take 3-5 minutes. Be careful not to overbeat, or it will turn to butter.
- Gently fold the whipped cream into the orange cream cheese mixture until no streaks remain. Be careful not to deflate the whipped cream.
- Pour the orange creamsicle filling into the cooled graham cracker crust. Smooth the top with a spatula. Cover the pie loosely with plastic wrap and refrigerate for at least 4-6 hours, or preferably overnight, to allow the pie to set completely.
- Just before serving, make the whipped cream topping: In a clean, cold bowl, beat 1 cup cold heavy cream with 2 tablespoons powdered sugar and 1/2 teaspoon vanilla extract until stiff peaks form.
- Spread or pipe the whipped cream topping over the chilled pie. Garnish with additional orange zest and fresh orange segments, if desired. Slice and serve immediately.
Notes
Pro Tips for Making This orange creamsicle pie
Creating a truly irresistible orange creamsicle pie is all about those little touches that elevate it from good to absolutely glorious. From ensuring your ingredients are at their prime to mastering the perfect chill, these tips are straight from my kitchen to yours.
- Cream Cheese Consistency: Always make sure your cream cheese is softened to room temperature. This is key for a truly smooth, lump-free filling that blends beautifully with the other ingredients, ensuring that delightful melt-in-your-mouth texture.
- Zest Before Juice: When working with oranges, I always recommend zesting the fruit before you juice it. It’s so much easier to get all that fragrant zest when the orange is whole and firm, making sure every bit of citrusy brightness makes it into your pie.
- The Power of Chill: This is a no-bake pie, and that means chill time is your best friend! Resist the urge to cut into it too soon. A minimum of 4-6 hours, or even better, overnight, ensures the pie sets perfectly and the flavors meld into that iconic creamsicle bliss.
- My Secret Trick: When making the whipped cream topping for this orange creamsicle pie, I always chill my mixing bowl and whisk attachment for 10-15 minutes before whipping. This simple step helps the cream whip up faster, firmer, and holds its beautiful peaks longer, making for a truly spectacular finish!
Fun Variations for orange creamsicle pie
One of the joys of home baking is making a recipe truly your own, and this orange creamsicle pie is wonderfully adaptable. Don’t be afraid to experiment with different flavor combinations to suit your mood or the season!
Berry Swirl Delight
For a beautiful contrast and an extra burst of flavor, try swirling a few tablespoons of raspberry or strawberry jam into your orange creamsicle filling before chilling. My sister always asks me to do this; she loves how the tartness of the berries complements the sweet orange, creating a gorgeous marble effect.
Tropical Twist
Substitute half of the orange juice with pineapple or mango juice for a tropical take on this classic. You can even add a sprinkle of toasted coconut flakes to the crust or topping for an extra layer of texture and island flair.
Spiced Up Crust
Instead of plain graham crackers, consider using ginger snaps or vanilla wafers for your crust. The subtle warmth of ginger or the delicate vanilla notes would add a lovely dimension to the bright orange flavors.
What to Serve With orange creamsicle pie
This refreshing orange creamsicle pie is a delightful standalone dessert, but a few thoughtful accompaniments can elevate it into an unforgettable experience. Think about balancing its creamy sweetness with something light and complementary.
- Fresh Berries: A scattering of fresh blueberries or raspberries adds a pop of color and a lovely tart counterpoint to the pie’s sweetness. It’s simple, elegant, and always a hit.
- A Light Citrus Salad: For a truly refreshing spread, I sometimes pair this pie with a small bowl of mixed citrus segments – grapefruit, mandarin, and orange – perhaps with a light honey-mint dressing.
- Iced Tea or Lemonade: On a warm day, a tall glass of freshly brewed iced tea or a sparkling lemonade is the perfect beverage to accompany the bright, creamy flavors of this delightful orange creamsicle pie. My mom always pairs citrus desserts with a good iced tea!
- Vanilla Bean Ice Cream: While the pie is creamy on its own, a tiny scoop of premium vanilla bean ice cream melting alongside a slice is pure indulgence and creates an even more decadent experience.
How to Store orange creamsicle pie
Ensuring your delectable orange creamsicle pie stays fresh is key to enjoying every last creamy bite. This no-bake wonder keeps beautifully with just a little care.
Once assembled, your pie should always be stored in the refrigerator. I like to keep it in an airtight container or covered tightly with plastic wrap to prevent it from absorbing any other fridge odors and to keep the crust from getting soggy. It will stay wonderfully fresh for up to 3-4 days. For longer storage, you can freeze individual slices or the entire pie, well-wrapped, for up to 1 month. To serve from frozen, simply thaw in the refrigerator for a few hours. My personal tip is to always slice it cold from the fridge for the cleanest cuts!
Nutritional Benefits
While this creamy orange dessert is undoubtedly a treat, incorporating fresh orange juice and zest provides a boost of Vitamin C and antioxidants, adding a little sunshine to your indulgence. The dairy components also offer calcium, making this orange creamsicle pie a delightful way to enjoy a sweet that’s both satisfying and nourishing, true to my belief that desserts can be wholesome and joyful.
FAQs
Faq 1
Yes, absolutely! This orange creamsicle pie is perfect for making ahead. In fact, it needs at least 4-6 hours to chill and set properly, making it an ideal dessert to prepare the day before your gathering.
Faq 2
While fresh orange juice and zest offer the best vibrant flavor, you can use high-quality, 100% pure orange juice from a carton. However, remember to still use fresh orange zest for that essential fragrant punch in your orange creamsicle pie.
Faq 3
To prevent a soggy crust in your orange creamsicle pie, ensure you bake your graham cracker crust for the recommended 10 minutes to help it crisp up. Also, allow it to cool completely before adding the filling.
Faq 4
Yes, you can freeze this orange creamsicle pie! Wrap it tightly in plastic wrap and then aluminum foil to prevent freezer burn. It will keep well for up to a month. Thaw in the refrigerator before serving.
Conclusion
There you have it, dear friends — a truly delightful orange creamsicle pie that brings together the best of creamy indulgence and bright, zesty freshness. It’s a recipe born from simple ingredients, a dash of nostalgia, and a whole lot of love, promising to be a refreshing centerpiece at your next family dinner or a quiet moment of bliss just for you. So, gather your ingredients, embrace the joy of creating, and watch as this magical dessert brings smiles and sweet memories to everyone at your table. Happy baking, from my heart to your kitchen!