
Oh, honey, there’s truly nothing quite like the comforting crunch and rich, buttery sweetness of homemade toffee bits. They’re those tiny little jewels that elevate everything from cookies to ice cream, transforming a simple dessert into something truly extraordinary. Making them from scratch might sound a little fancy, but trust me, it’s a delightful kitchen adventure that brings so much joy and flavor, creating a treat that feels both classic and magical.
I still remember the first time my grandmother showed me how to make them, her hands patiently stirring, the scent of melting sugar filling her cozy kitchen. It felt like alchemy, watching simple ingredients become something so utterly delicious. Those shared moments, the anticipation of that perfect brittle snap, are what make baking so special to me.
This recipe for homemade toffee bits is not only incredibly easy to bake, making it perfect for bakers of all levels, but it’s also wonderfully family-friendly, ideal for adding a special touch to holiday treats or just a weeknight dessert. My top tip? Always have your ingredients measured and ready; a little mise en place makes all the difference!
What You Need to Make This Recipe
Crafting the perfect homemade toffee bits requires just a few pantry staples, creating that irresistible buttery crunch we all adore. Unsalted butter forms the rich base, while a blend of granulated sugar and light corn syrup ensures that beautiful, golden caramelization. I always use a good quality vanilla extract for a deeper, more aromatic flavor that really makes these homemade toffee bits shine. You’ll find the complete list of ingredients and precise measurements in the recipe card below.
How to Make homemade toffee bits
Making your own homemade toffee bits is a simple dance of sugar and heat, and oh, the magic that unfolds! You’ll begin by preparing your workspace, making sure everything is ready. Then, it’s a calm and steady process of cooking the toffee base until it reaches that perfect golden hue. After cooling, a satisfying crack breaks it into those delightful bits. For an extra special touch, you can even add an optional chocolate coating. It’s a process that truly brings out the joy of creating something wonderful from scratch.
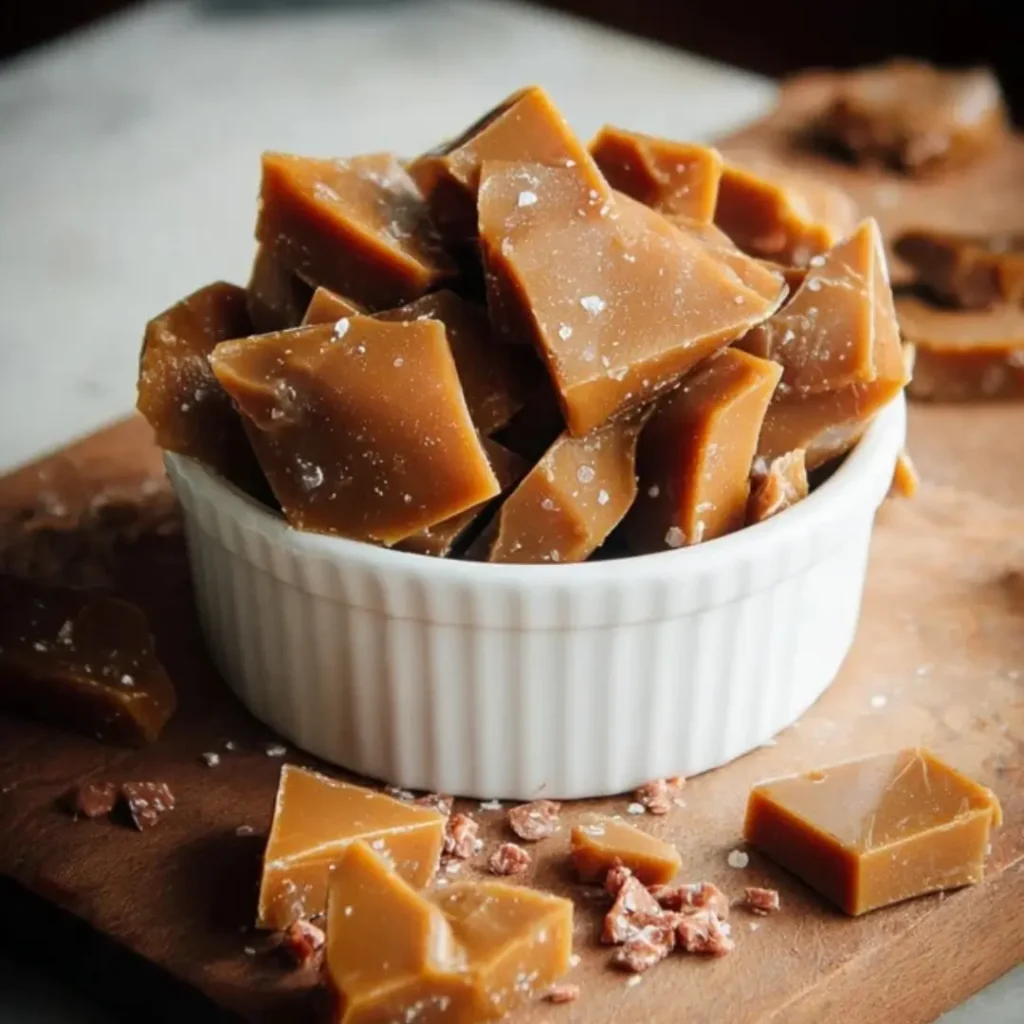
![A white bowl filled with chunks of {{ $('Fetch Recipe Data').first().json["Main Keyword"] }}.](https://tastytablekitchen.com/wp-content/uploads/2026/04/homemade-toffee-bits-.webp)
Classic Homemade Toffee Bits
Ingredients
Equipment
Method
- Line a large baking sheet (approx. 13×18 inches) with parchment paper. Lightly grease the parchment paper with butter or non-stick spray. Set aside.
- In a heavy-bottomed 3-quart saucepan, combine the unsalted butter pieces, granulated sugar, water, light corn syrup, and fine sea salt. Place over medium heat.
- Stir continuously with a rubber spatula until the butter is completely melted and the sugar is fully dissolved. This should take about 3-5 minutes. Ensure no sugar crystals remain on the sides of the pan.
- Attach a candy thermometer to the side of the saucepan, ensuring the tip does not touch the bottom. Increase the heat to medium-high and bring the mixture to a boil. Allow it to boil without stirring, occasionally swirling the pan gently if needed, until the temperature reaches 300-310°F (149-154°C), which is the hard crack stage. This process typically takes 10-15 minutes.
- Once the temperature reaches 300-310°F, immediately remove the saucepan from the heat. Carefully stir in the vanilla extract. The mixture will bubble vigorously, so be cautious.
- Quickly and carefully pour the hot toffee mixture onto the prepared baking sheet. Using an offset spatula or the back of a spoon, spread the toffee into a thin, even layer, about 1/8 to 1/4 inch thick. Work quickly as it will begin to set.
- Let the toffee cool completely at room temperature, undisturbed, for at least 1 hour, or until it is very hard and brittle. Do not refrigerate, as this can cause it to become sticky.
- Once completely cooled and hardened, carefully peel the toffee off the parchment paper. Place it in a large, sturdy zip-top bag. Using a rolling pin or a meat mallet, gently break the toffee into small, irregular bits. Avoid smashing too hard to prevent very fine dust.
- If desired, melt the semisweet chocolate chips in a microwave-safe bowl in 30-second intervals, stirring until smooth. Spread the melted chocolate evenly over the cooled toffee slab before breaking it, or drizzle over the bits. If spreading, sprinkle with chopped nuts while the chocolate is still wet. Let the chocolate set completely before breaking or serving.
Notes
Pro Tips for Making This homemade toffee bits
Creating the perfect homemade toffee bits is all about a little patience and a few tried-and-true techniques. Over my years in the kitchen, I’ve learned some simple tricks that ensure a batch of crunchy, delicious toffee every single time.
Temperature is Your Friend
The most crucial aspect of making homemade toffee bits is reaching the correct temperature. I always use a reliable candy thermometer. For that ideal brittle texture, aim for 300-305°F (149-152°C), or “hard crack” stage. Don’t rush it; consistent, gentle heat is key to preventing scorching and ensuring an even cook.
My Secret Trick: Prep Your Pan Like a Pro
I always line my baking sheet with parchment paper and lightly grease it before I even start cooking the toffee. This makes cooling and, more importantly, removal and breaking so much easier. Trust me, nothing is more frustrating than sticky toffee bits that cling to the pan!
Stir Gently, Not Constantly
While you need to stir the mixture initially to dissolve the sugar, once it comes to a boil, stirring too much can cause crystallization. I recommend stirring just enough to ensure even heating, but don’t obsess over it. Let the mixture do its work.
Embrace the Crunch
Once your homemade toffee bits have cooled completely, be bold! It’s wonderfully satisfying to break them into pieces. A small meat mallet or even the back of a sturdy spoon works perfectly. Don’t worry about perfect shapes; the rustic edges are part of their charm.
Fun Variations for homemade toffee bits
One of the greatest joys of baking from scratch is the freedom to play and personalize, and homemade toffee bits are no exception! There are so many delightful ways to add your own special touch to this classic treat.
Nutty Indulgence
My friend Sarah always asks me to add chopped nuts to her batches! Right after pouring the hot toffee onto the prepared sheet, sprinkle finely chopped pecans, almonds, or walnuts over the top. Press them lightly into the hot toffee. This adds a wonderful texture and a rich, earthy flavor that complements the buttery sweetness beautifully.
Chocolate Drizzle Delight
For a truly decadent twist, consider an optional coating of melted semisweet chocolate chips. Once your homemade toffee bits have cooled and been broken into pieces, you can drizzle them with melted chocolate or even dip individual pieces. A sprinkle of sea salt on top of the chocolate before it sets is a sophisticated touch my family adores.
Spice it Up!
A pinch of ground cinnamon or a tiny bit of cayenne pepper can add a surprising warmth and complexity. Stir it into the sugar mixture in the last few minutes of cooking. Just a hint can transform the flavor profile, making your homemade toffee bits wonderfully unique.
What to Serve With homemade toffee bits
These glorious homemade toffee bits are so versatile, they elevate almost any sweet treat you pair them with! Their crunchy texture and rich caramel flavor make them a fantastic companion for both simple and elaborate desserts.
I love sprinkling them generously over a scoop of creamy vanilla bean ice cream; the contrast of cold and crunchy is just divine! They’re also absolutely dreamy mixed into your favorite chocolate chip cookie dough before baking, adding an extra layer of texture and sweetness. My mom always pairs them with a steaming cup of her homemade hot cocoa on a chilly evening, a truly comforting combination. For a quick and easy serving idea, simply fold them into a bowl of plain Greek yogurt with a drizzle of honey for a delightful snack.
How to Store homemade toffee bits
To keep your homemade toffee bits perfectly crisp and delicious, proper storage is key. You’ve put so much love into making them, and we want every bite to be as good as the first!
Airtight Storage for Freshness
Once your toffee bits are completely cooled and broken, I always recommend storing them in an airtight container at room temperature. This will keep them wonderfully crisp for up to two weeks. The enemy of toffee is moisture, so make sure that container is sealed tight!
Freezing for Longer Enjoyment
If you’ve made a big batch of homemade toffee bits (and who can blame you?), they freeze beautifully! Simply place them in a freezer-safe, airtight container or a heavy-duty freezer bag. They’ll keep well in the freezer for up to three months. When you’re ready to enjoy them, just let them thaw at room temperature for about 15-20 minutes. My personal tip for freezer storage is to separate layers with parchment paper if you have a lot, to prevent any sticking.
Nutritional Benefits
While our homemade toffee bits are certainly a delightful indulgence, they also offer simple satisfaction. Made with wholesome butter and sugar, this treat provides a quick energy boost, and if you choose to add nuts, you’ll also get some healthy fats and protein. It’s a wonderful example of combining simple ingredients into a dessert that’s both satisfying and nourishing in its joy-giving way.
FAQs
Faq 1
Can I make homemade toffee bits ahead of time for baking?
Absolutely! Homemade toffee bits are perfect for making ahead. Store them in an airtight container at room temperature for up to two weeks, or freeze them for up to three months. This makes them super convenient for last-minute dessert additions!
Faq 2
What’s the best way to prevent homemade toffee bits from sticking to the pan?
The absolute best way is to line your baking sheet with parchment paper and lightly grease it. This creates a non-stick surface, ensuring your homemade toffee bits release easily once cooled and ready to break.
Faq 3
Why did my homemade toffee bits turn out soft instead of crunchy?
If your homemade toffee bits are soft, it usually means the mixture didn’t reach the “hard crack” stage (300-305°F or 149-152°C). Using a candy thermometer and reaching the correct temperature is crucial for that signature crunchy texture.
Faq 4
Can I use homemade toffee bits in other desserts besides cookies?
Oh, absolutely! These versatile homemade toffee bits are fantastic sprinkled over ice cream, stirred into brownie batter, mixed into cake frosting, or even just enjoyed on their own as a sweet snack.
Conclusion
There’s a special kind of magic that happens when you create something sweet from scratch, and these homemade toffee bits are a perfect example. From the gentle hum of the stove to the satisfying crunch, every step is a little act of love. I hope this recipe inspires you to embrace the joy of baking, to make memories in your kitchen, and to share these delightful treats with everyone you hold dear. Happy baking, sweet friends!