
There’s something truly magical about a warm, freshly made Italian piadina, isn’t there? This humble flatbread, with its tender chew and subtle savory notes, instantly transports me back to sun-drenched Italian markets. It’s a testament to how simple ingredients, lovingly combined, can create something so deeply satisfying and utterly delicious. Every bite of this authentic Italian piadina feels like a warm embrace from nonna, a truly comforting treat that speaks to the soul.
My journey with baking began in my grandmother’s bustling kitchen, where the aroma of yeast and sugar always filled the air. She taught me that baking isn’t just about following a recipe; it’s about pouring your heart into every step. This piadina recipe, while not a sweet dessert, carries that same spirit of warmth and homemade goodness that I cherish.
What I adore most about making this Italian flatbread is how approachable and versatile it is, perfect for a quick lunch or a delightful snack with friends. It’s truly a recipe that brings people together around the table. My top tip? Don’t be afraid to get your hands a little floury – that’s where the joy of baking truly begins!
What You Need to Make This Recipe
Crafting this delightful flatbread requires just a few pantry staples, proving that extraordinary flavors often come from the simplest sources. The all-purpose flour provides the perfect tender structure, while a touch of lard creates that irresistibly soft texture, making this Italian piadina truly special. You’ll find the complete list of ingredients and precise measurements in the recipe card below, ready for your kitchen adventure.
How to Make italian piadina
Creating this classic Italian piadina is a wonderfully straightforward process that yields incredibly rewarding results. You’ll start by mixing and kneading the dough, allowing it to rest beautifully. Next, roll out your piadine into thin discs and cook them gently on a griddle until they’re golden and slightly puffed. Finally, fill them with your favorite ingredients, and serve! It’s a journey from simple flour to a delicious, authentic treat.
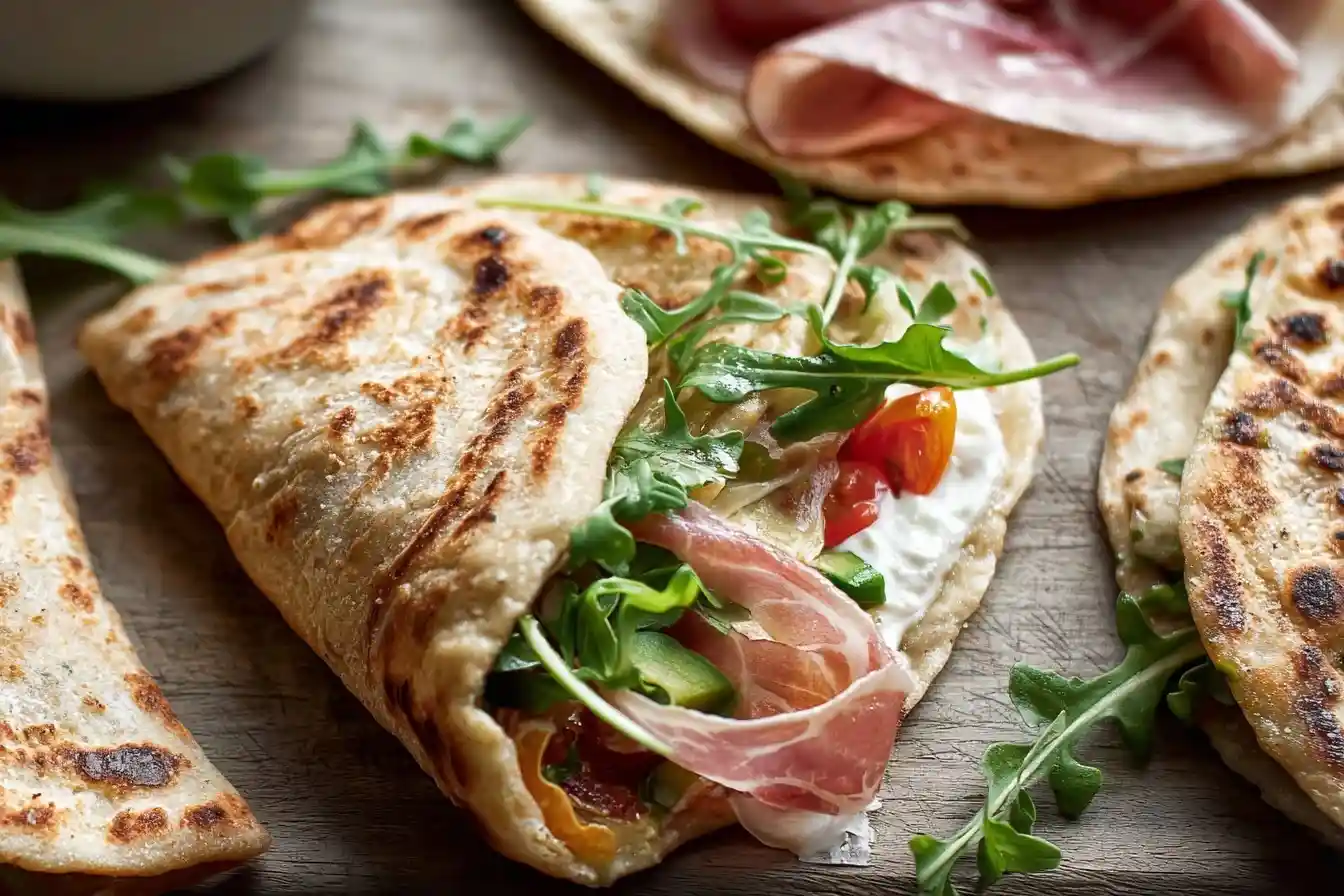
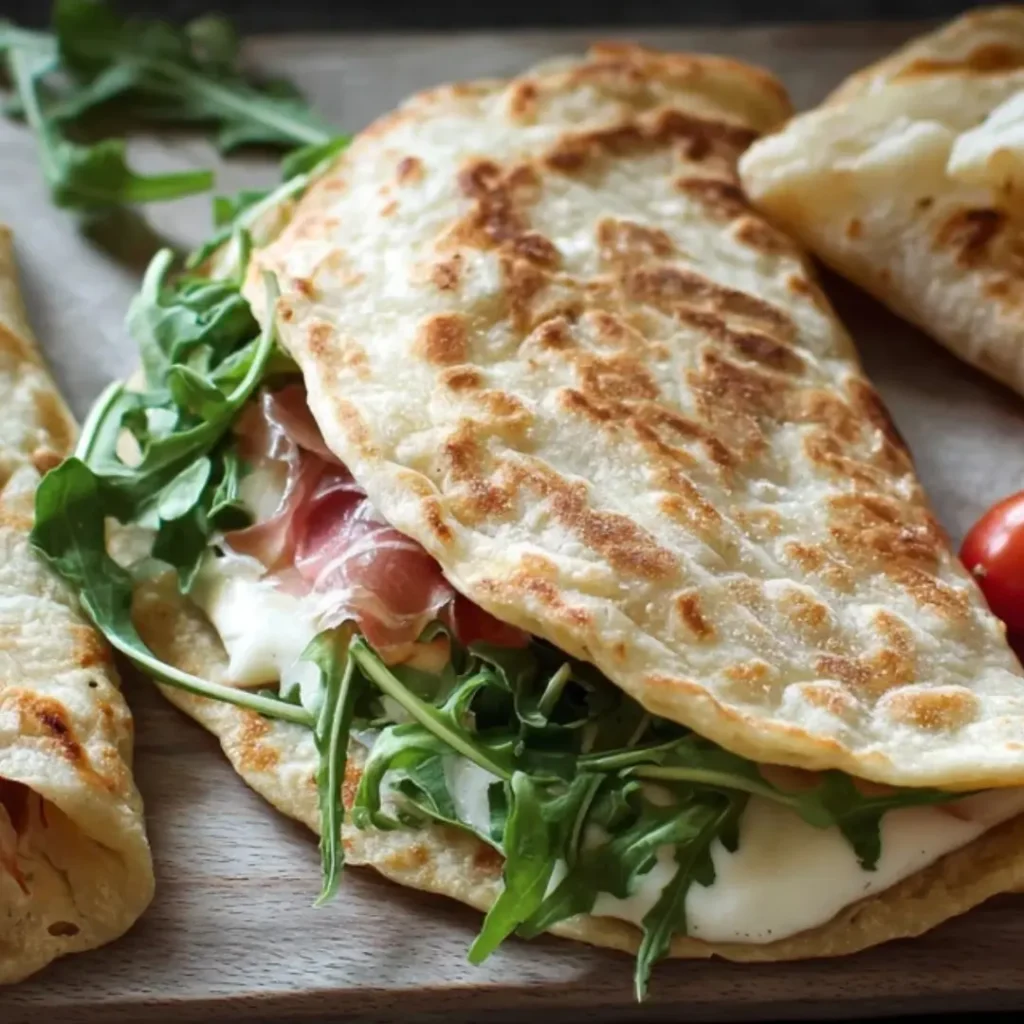
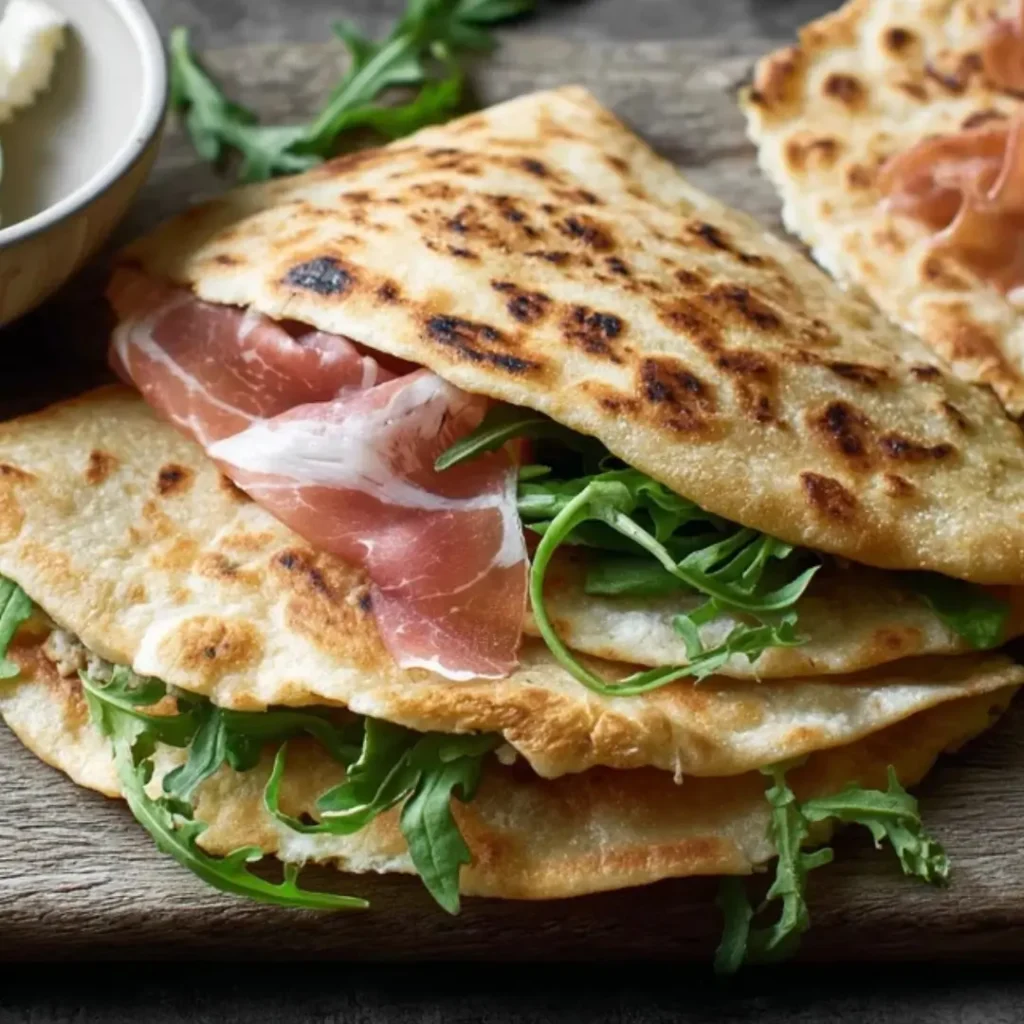
Classic Italian Piadina with Prosciutto, Arugula & Stracchino
Ingredients
Equipment
Method
- In a large mixing bowl, whisk together the flour, baking soda, and salt. Make a well in the center.
- Pour the melted lard (or olive oil) and warm water into the well. Gradually incorporate the flour from the sides, mixing with your hands until a shaggy dough forms.
- Turn the dough out onto a lightly floured surface and knead for 8-10 minutes until it’s smooth, elastic, and no longer sticky. If the dough is too sticky, add a tiny bit more flour; if too dry, a tiny bit more water.
- Form the dough into a ball, place it back in the bowl, cover with a damp kitchen towel, and let it rest at room temperature for at least 30 minutes (up to 2 hours). This allows the gluten to relax, making the dough easier to roll.
- Divide the rested dough into 4 equal pieces. Roll each piece into a ball.
- Lightly flour your work surface and a rolling pin. Take one dough ball and roll it out into a very thin, round disc, about 8-10 inches (20-25 cm) in diameter and about 1/8 inch (3 mm) thick. It doesn’t need to be perfectly round. Repeat with the remaining dough balls, keeping the unrolled dough covered.
- Heat a cast-iron skillet or non-stick griddle over medium-high heat until hot. Do not add oil.
- Place one piadina onto the hot skillet. Cook for 1-2 minutes per side, or until golden brown spots appear and the piadina puffs up slightly. Prick any large bubbles with a fork to prevent excessive puffing.
- Remove the cooked piadina from the skillet and stack it on a plate, covering it with a clean kitchen towel to keep it warm and pliable while you cook the remaining piadine.
- Once all piadine are cooked, take one warm piadina. Spread about 1 tablespoon of stracchino cheese evenly over one half of the piadina.
- Layer a few slices of prosciutto crudo over the cheese, followed by a handful of fresh arugula.
- Fold the piadina in half, gently pressing down. Serve immediately. Repeat with the remaining piadine and fillings.
Notes
Pro Tips for Making This italian piadina
Over the years, I’ve learned a few tricks that make all the difference when whipping up a batch of these glorious Italian piadine. These little insights ensure your flatbreads are always perfectly tender and flavorful, just like nonna used to make.
Perfecting the Dough: When mixing your Italian piadina dough, pay close attention to its consistency. It should be soft and pliable, not too sticky. If it feels too dry, add a tiny bit more warm water, a teaspoon at a time. A well-hydrated dough leads to a wonderfully tender flatbread.
My Secret Trick: I always let the dough rest for at least 30 minutes, covered, at room temperature before rolling. This isn’t just about letting the gluten relax; it allows the flavors to meld beautifully and makes the dough much easier to handle, resulting in a perfectly tender Italian piadina.
Rolling Evenly: To get that signature even thinness, use a lightly floured surface and rotate the dough frequently as you roll. Aim for about 1/8-inch thickness, which will cook quickly and give you that ideal soft, chewy texture.
Don’t Overcook! Piadine cook relatively quickly, typically just 1-2 minutes per side until you see lovely golden-brown spots. Resist the urge to leave them on the griddle for too long, as this can make them tough. You want them soft and pliable, ready to embrace those delicious fillings.
Fun Variations for italian piadina
One of the things I adore about Italian piadina is how wonderfully adaptable it is. While the classic pairing of prosciutto, arugula, and stracchino is simply divine, there’s so much room for creativity! Here are a few ideas that my friends and family absolutely love, to help you make this flatbread truly your own.
Sweet Sensations
My niece always begs me to make a sweet version! Spread warm Italian piadina with a generous layer of Nutella, then add sliced bananas or fresh berries. A sprinkle of chopped hazelnuts takes it over the top. It’s like a warm, comforting hug in every bite.
Mediterranean Twist
For a lighter, fresher take, try filling your piadina with grilled vegetables like zucchini, bell peppers, and eggplant, along with a dollop of creamy goat cheese or a sprinkle of crumbled feta. A drizzle of balsamic glaze ties all the flavors together beautifully, creating a vibrant and healthy option.
Hearty & Savory
If you’re looking for something a bit more substantial, consider using leftover grilled chicken or thinly sliced roast beef. Pair it with a sharp provolone or fontina cheese, and add some caramelized onions for a depth of flavor that’s simply irresistible. This hearty Italian piadina makes for a fantastic lunch.
What to Serve With italian piadina
The beauty of a freshly made Italian piadina is that it’s a star all on its own, but it truly shines when paired with simple, complementary flavors. It’s all about enhancing that delightful taste and texture!
I often serve piadina alongside a fresh, crisp green salad tossed with a light vinaigrette. The bright acidity of the dressing beautifully cuts through the richness of the prosciutto and cheese. For a quick and easy serving idea, a small bowl of olives and some marinated artichoke hearts make a perfect accompaniment. And for those cozy evenings, my mom always suggests pairing Italian piadina with a glass of crisp white wine or a refreshing sparkling water with a slice of lemon. Pure simple joy!
How to Store italian piadina
After all the love you put into making your Italian piadina, you’ll want to ensure any leftovers stay fresh and delicious. Proper storage means you can enjoy that homemade goodness for a little longer!
Fridge Storage
Once your piadine have cooled completely, stack them with a piece of parchment paper between each one to prevent sticking. Place them in an airtight container or a resealable bag and store them in the refrigerator for up to 3-4 days. When I store my baked goods, I always make sure the container is truly airtight; it makes all the difference in maintaining freshness!
Reheating for Freshness
To enjoy leftover Italian piadina, I recommend briefly reheating them. You can warm them gently in a dry skillet over medium heat for about 30 seconds to 1 minute per side until they are soft and pliable again. Alternatively, a quick zap in the microwave for 10-15 seconds works too, but be careful not to overdo it, or they can become a bit chewy. Reheating brings back that wonderful tenderness, almost like they were just made!
Nutritional Benefits
While we often focus on the joy and flavor of a homemade dish, it’s lovely to know that this Italian piadina offers some wholesome goodness too. With the lean protein from the prosciutto and the calcium-rich stracchino cheese, it’s a treat that’s both satisfying and nourishing. It beautifully marries the indulgence of a delicious meal with simple, quality ingredients.
FAQs
Faq 1
What makes piadina different from other flatbreads?
Italian piadina stands out with its use of lard (traditionally) for a unique tenderness and flavor, and it’s cooked on a griddle rather than baked in an oven. Its pliability makes it perfect for folding around savory fillings, offering a distinct texture and taste.
Faq 2
Can I make Italian piadina dough ahead of time?
Absolutely! You can prepare the Italian piadina dough up to 24 hours in advance. Simply wrap it tightly in plastic film and store it in the refrigerator. Just remember to let it come to room temperature for about 30 minutes before rolling and cooking for the best results.
Faq 3
What if I don’t have stracchino cheese?
No stracchino? No problem! You can easily substitute it with other soft, creamy cheeses like fresh mozzarella, ricotta salata, or even a mild cream cheese. The key is to choose a cheese that melts beautifully and complements the rich prosciutto in your Italian piadina.
Faq 4
Can I use a different fat instead of lard?
While lard is traditional for the authentic Italian piadina flavor and texture, you can certainly use olive oil or butter as a substitute. Keep in mind that the texture and flavor might be slightly different, but it will still yield a delicious homemade flatbread.
Conclusion
Creating your own Italian piadina is more than just cooking; it’s an invitation to bring a piece of Italy right into your kitchen, filling your home with wonderful aromas and even better flavors. This simple yet profound flatbread is a testament to the fact that with a little bit of love and patience, even the most basic ingredients can transform into something truly memorable. I hope you embrace the joy of making this authentic Italian piadina, sharing its warmth and deliciousness with those you hold dear, and creating sweet, savory memories around your table. Happy cooking, my dear friends!