
Oh, friends, there’s just something truly magical about a batch of homemade pink velvet cookies. These aren’t just any cookies; they’re little bites of joy, soft and tender with that signature hint of cocoa, all wrapped in a delightful pink hue. Each one is crowned with a luscious, tangy cream cheese glaze that simply melts in your mouth, making them utterly irresistible.
I remember my grandmother, bless her heart, always said the best desserts came from a place of love and a little bit of whimsy. She’d often encourage me to play with colors and flavors, turning simple cookie dough into something extraordinary. These lovely treats bring back those cherished memories, reminding me of afternoons spent laughing and baking in her cozy kitchen.
This recipe for soft pink velvet cookies is not only wonderfully easy to bake, perfect for gathering the family, but it also creates a stunning visual treat ideal for any celebration. My top tip for these is to always use room temperature butter and cream cheese for that perfectly smooth, silky dough and glaze!
What You Need to Make This Recipe
Crafting these delightful cookies starts with simple, wholesome ingredients from your pantry. We’re talking about the comforting warmth of all-purpose flour, the richness of unsalted butter, and of course, a touch of red food coloring to give these pink velvet cookies their signature charming hue. I always believe that quality ingredients, like good vanilla extract, make all the difference in the final flavor. The full list and exact measurements are waiting for you in the recipe card below!
How to Make pink velvet cookies
Making these delightful pink velvet cookies is a journey of sweet anticipation! You’ll begin by preparing the vibrant pink dough, combining your dry and wet ingredients until just mixed, then chilling it slightly to ensure the perfect texture. Next, the cookies are baked until they’re soft and fragrant, filling your kitchen with an aroma of pure bliss. While they cool, you’ll whip up a dreamy cream cheese glaze, ready to generously adorn each one for that irresistible finish.
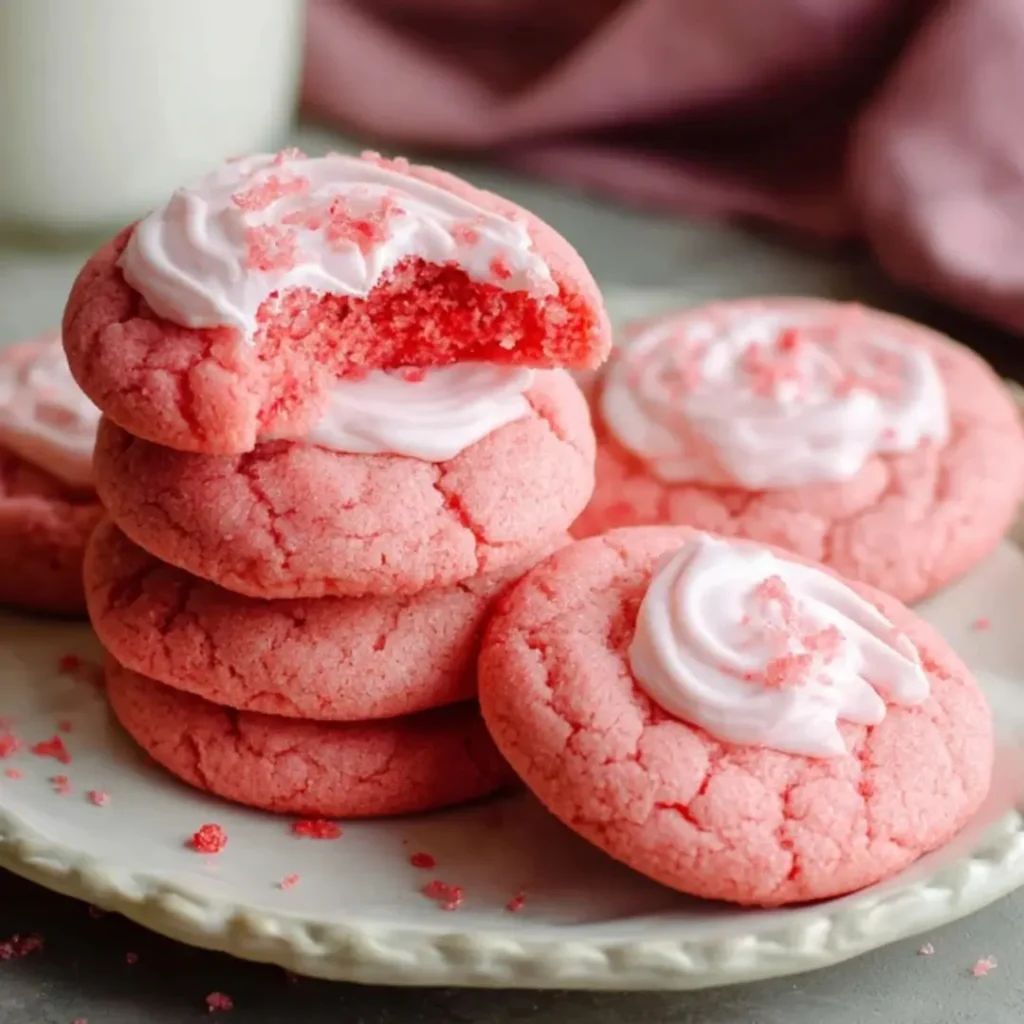
![Stack of {{ $('Fetch Recipe Data').first().json["Main Keyword"] }} with white chocolate chips, top one bitten.](https://tastytablekitchen.com/wp-content/uploads/2026/04/pink-velvet-cookies-.webp)
Pink Velvet Cookies with Cream Cheese Glaze
Ingredients
Equipment
Method
- Preheat your oven to 350°F (175°C). Line two baking sheets with parchment paper.
- In a medium bowl, whisk together the flour, baking powder, and salt. Set aside.
- In a large mixing bowl, combine the melted butter and granulated sugar. Beat with an electric mixer on medium speed until smooth and creamy, about 1-2 minutes.
- Beat in the egg, vanilla extract, and white vinegar until well combined. Scrape down the sides of the bowl as needed.
- Add the red food coloring, starting with 1 teaspoon, and mix until the desired vibrant pink color is achieved. Add more if a deeper color is desired.
- Gradually add the dry ingredients to the wet ingredients, mixing on low speed until just combined. Be careful not to overmix.
- Drop rounded tablespoons of dough onto the prepared baking sheets, spacing them about 2 inches apart. You can lightly flatten them slightly with your palm if you prefer a flatter cookie.
- Bake for 9-11 minutes, or until the edges are lightly set and the centers still look slightly soft. Do not overbake to ensure soft, chewy cookies.
- Remove from the oven and let the cookies cool on the baking sheets for 5 minutes before transferring them to a wire rack to cool completely.
- While the cookies are cooling, prepare the glaze. In a medium bowl, beat the softened cream cheese with an heuristic mixer until smooth and creamy.
- Gradually add the sifted powdered sugar, milk, and vanilla extract. Beat until the glaze is smooth and pourable. If it’s too thick, add a tiny bit more milk; if too thin, add a little more powdered sugar.
- Once the cookies are completely cool, drizzle or spread the cream cheese glaze over each cookie. Allow the glaze to set for about 15-20 minutes before serving.
Notes
Pro Tips for Making This pink velvet cookies
Creating the perfect batch of pink velvet cookies is truly a labor of love, and over the years, I’ve gathered a few cherished tips that I just have to share. These little secrets will ensure your cookies turn out beautifully every single time, as soft and delightful as can be!
My Secret Trick: I always recommend adding a tiny splash of white vinegar to the cookie dough! It reacts beautifully with the baking powder, enhancing the red food coloring for a more vibrant pink and contributing to that wonderfully soft, tender crumb we all adore in pink velvet cookies.
When you’re creaming your butter and sugar, take your time. This step is crucial for incorporating air, which results in a lighter, more tender cookie. I usually beat them together for at least 2-3 minutes until the mixture is pale and fluffy.
For the best texture, don’t overmix your dough once you add the flour. Just mix until everything is combined to avoid tough cookies. Overworking the gluten can make your cookies dense, and we want soft, melt-in-your-mouth perfection!
Always let your cookies cool completely before glazing them. If they’re even a little warm, that beautiful cream cheese glaze will simply melt and run off, which we definitely don’t want after all our hard work! Patience is a baker’s best friend.
Fun Variations for pink velvet cookies
The beauty of baking, for me, is the endless possibility for creativity, especially with something as versatile as pink velvet cookies! It’s like painting with flavors and textures. My sister, for instance, always asks me to swirl a little raspberry jam into the dough before baking for an extra fruity surprise. Here are a few ways you can make these delightful treats uniquely yours:
- Citrus Zest Twist: For a bright, zesty note, try adding a teaspoon of orange or lemon zest to the cookie dough. It beautifully complements the subtle cocoa and vanilla flavors of the pink velvet cookies, offering a lovely fresh contrast to the sweet glaze.
- Chocolate Chip Swirl: Who doesn’t love a little extra chocolate? Fold in a handful of white chocolate chips or even mini semi-sweet chocolate chips into the dough for added texture and a burst of chocolatey goodness. My friend loves when I do this, saying it makes them extra decadent!
- Nutty Crunch: If you enjoy a bit of crunch, lightly toast and finely chop some pecans or walnuts and mix them into the dough. This adds a lovely nutty depth that pairs wonderfully with the soft cookie and creamy glaze.
What to Serve With pink velvet cookies
These adorable pink velvet cookies are a celebration in themselves, but pairing them with the right accompaniments can elevate the experience even further! They’re perfect for a sweet ending to any meal or a delightful afternoon treat. I love serving them up with a little something extra, just to make the moment feel even more special.
A classic pairing, in my book, is a tall glass of cold milk. The creamy milk is the perfect counterpoint to the sweet, tangy glaze and the soft cookie. For the adults, a freshly brewed cup of coffee or a warm mug of herbal tea creates a cozy and comforting experience. My mom always pairs her cookies with a rich hot cocoa in winter, and it’s simply divine. You could also serve them alongside a scoop of vanilla bean ice cream, letting the cold creaminess melt slightly into the soft cookies for an extra decadent dessert. For a lighter touch, a small bowl of fresh mixed berries, like raspberries and blueberries, adds a burst of freshness that complements the sweetness of these pink velvet cookies beautifully.
How to Store pink velvet cookies
After all the love you’ve poured into baking your delightful pink velvet cookies, you’ll want to make sure they stay fresh and delicious for as long as possible! Proper storage is key to preserving their soft texture and the creamy goodness of the glaze.
Once completely cooled and glazed, I like storing pink velvet cookies in an airtight container at room temperature for up to 2-3 days. If you want them to last longer, especially with the cream cheese glaze, they’re best kept in the refrigerator for up to a week. Just make sure the container is truly airtight to prevent them from drying out!
For longer storage, you can freeze unglazed cookies for up to 3 months. Simply thaw them at room temperature, then whip up a fresh batch of glaze before serving. If your glazed cookies were refrigerated, I recommend letting them come to room temperature for about 15-20 minutes before enjoying, as this really brings out their tender texture and full flavor. My personal tip for fridge storage is to place a piece of parchment paper between layers of cookies to prevent the glaze from sticking.
Nutritional Benefits
While pink velvet cookies are certainly a delightful indulgence, baking them at home means you control the ingredients, making them a treat that’s both satisfying and made with love. They offer a comforting blend of simple ingredients, and a homemade cookie always brings a little joy to the soul. It’s about savoring a delicious moment!
FAQs
Faq 1
Can I make the cookie dough ahead of time?
Yes, absolutely! You can prepare the pink velvet cookies dough up to 24 hours in advance. Wrap it tightly in plastic wrap and refrigerate. This can actually deepen the flavors and make the dough easier to handle when it’s time to bake.
Faq 2
What can I use if I don’t have red food coloring?
While red food coloring gives these pink velvet cookies their signature hue, you could try a small amount of beet powder for a natural pink tint, though the color might be less vibrant. Alternatively, you can omit it entirely for a lovely vanilla cookie with cream cheese glaze.
Faq 3
My cookies spread too much. What did I do wrong?
Cookies often spread if your butter was too warm, or if you didn’t chill the dough sufficiently. Ensure your butter is cool room temperature, and always chill the pink velvet cookies dough for at least 30 minutes before baking to help them hold their shape.
Faq 4
Can I use store-bought cream cheese frosting?
Yes, you can certainly use a good quality store-bought cream cheese frosting in a pinch for these pink velvet cookies! However, I find that a homemade glaze truly elevates the flavor and texture, making the whole experience feel a little more special and authentic.
Conclusion
There’s truly nothing quite like the warmth and comfort of a batch of homemade pink velvet cookies. They are a testament to the simple magic that happens in our kitchens when we combine a few ingredients with a lot of love and a dash of creativity. I hope this recipe inspires you to create your own sweet memories, filling your home with the joyful aroma of freshly baked treats. Remember, every cookie baked with heart tells a beautiful story. Happy baking, my friends!