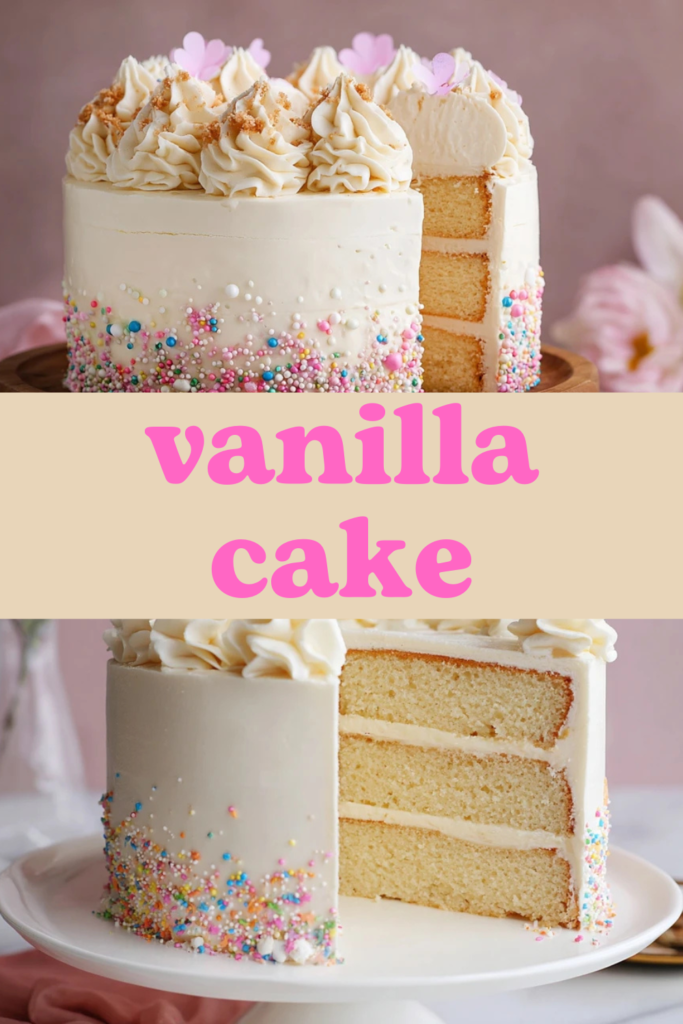
Oh, friends, there’s nothing quite like the comforting aroma of a homemade vanilla cake wafting through your kitchen, is there? This classic treat, with its light, fluffy crumb and rich, creamy buttercream, has a magical way of making any moment feel special. It’s a timeless dessert that promises pure joy with every tender bite, a true testament to the simple elegance of baking with love.
I can still close my eyes and picture my grandmother, a dusting of flour on her apron, carefully sifting ingredients as she taught me the secrets of a truly wonderful cake. Those afternoons, filled with laughter and the sweet scent of baking, laid the foundation for my lifelong passion. Every time I bake a vanilla cake, I’m transported back to those cherished memories.
This recipe for a classic fluffy vanilla cake is designed to be approachable for every home baker, promising a delightful dessert that’s perfect for family gatherings, birthdays, or simply a sweet afternoon pick-me-up. With just a little patience and my tried-and-true tips, you’ll create a masterpiece that brings smiles all around.
What You Need to Make This Recipe
Crafting this vanilla cake begins with simple pantry staples, like all-purpose flour and granulated sugar, but the magic truly unfolds with pure vanilla extract and real unsalted butter, ensuring that deep, comforting flavor I adore. These few stars come together to create a cake that’s truly special. You’ll find the full ingredient list and exact measurements in the recipe card below.
How to Make vanilla cake
Baking this vanilla cake is a journey of three joyful steps: first, preparing the tender vanilla cake layers that bake up light and golden. Next, whisking together that dreamy, fluffy vanilla buttercream. Finally, with a sprinkle of love, assembling your beautiful creation to be shared and savored. It’s a process that builds anticipation, leading to a truly rewarding dessert.

Classic Fluffy Vanilla Cake with Buttercream
Ingredients
Equipment
Method
- Preheat your oven to 350°F (175°C). Grease and flour two 8-inch round cake pans, then line the bottoms with parchment paper. This helps prevent sticking and makes removal easier.
- In a large bowl, whisk together the sifted all-purpose flour, granulated sugar, baking powder, and salt until well combined. Set aside.
- In the bowl of a stand mixer fitted with the paddle attachment (or using a hand mixer), cream the softened unsalted butter on medium speed for about 2 minutes, until light and fluffy.
- Add the eggs one at a time, beating well after each addition. Scrape down the sides of the bowl as needed. Beat until the mixture is light in color and fluffy, about 2-3 minutes.
- In a separate small bowl, combine the room temperature whole milk and pure vanilla extract.
- With the mixer on low speed, gradually add about one-third of the dry ingredients to the butter mixture, mixing until just combined. Then, add half of the milk mixture, mixing until just combined. Repeat with another third of the dry ingredients, the remaining milk mixture, and finally the last third of the dry ingredients. Mix until just incorporated, being careful not to overmix. Overmixing can lead to a dense cake.
- Divide the batter evenly between the two prepared cake pans. Smooth the tops with a spatula.
- Bake for 28-32 minutes, or until a wooden skewer inserted into the center of the cakes comes out clean. The tops should be lightly golden and spring back when gently touched.
- Remove the cakes from the oven and let them cool in their pans on a wire rack for 10-15 minutes. Then, invert the cakes onto the wire rack, remove the parchment paper, and let them cool completely before frosting (at least 1 hour).
- In the bowl of a stand mixer fitted with the paddle attachment, beat the softened unsalted butter on medium-high speed for 3-5 minutes, until very light and fluffy. This step is crucial for light buttercream.
- With the mixer on low speed, gradually add the sifted powdered sugar, 1 cup at a time, until fully incorporated. Once all sugar is added, increase speed to medium-high and beat for another 2-3 minutes.
- Add the pure vanilla extract, heavy cream (or milk), and a pinch of salt. Beat on medium-high speed for another 2-3 minutes, scraping down the sides of the bowl, until the buttercream is light, fluffy, and smooth. If too thick, add more cream 1 tablespoon at a time; if too thin, add more powdered sugar 1/4 cup at a time.
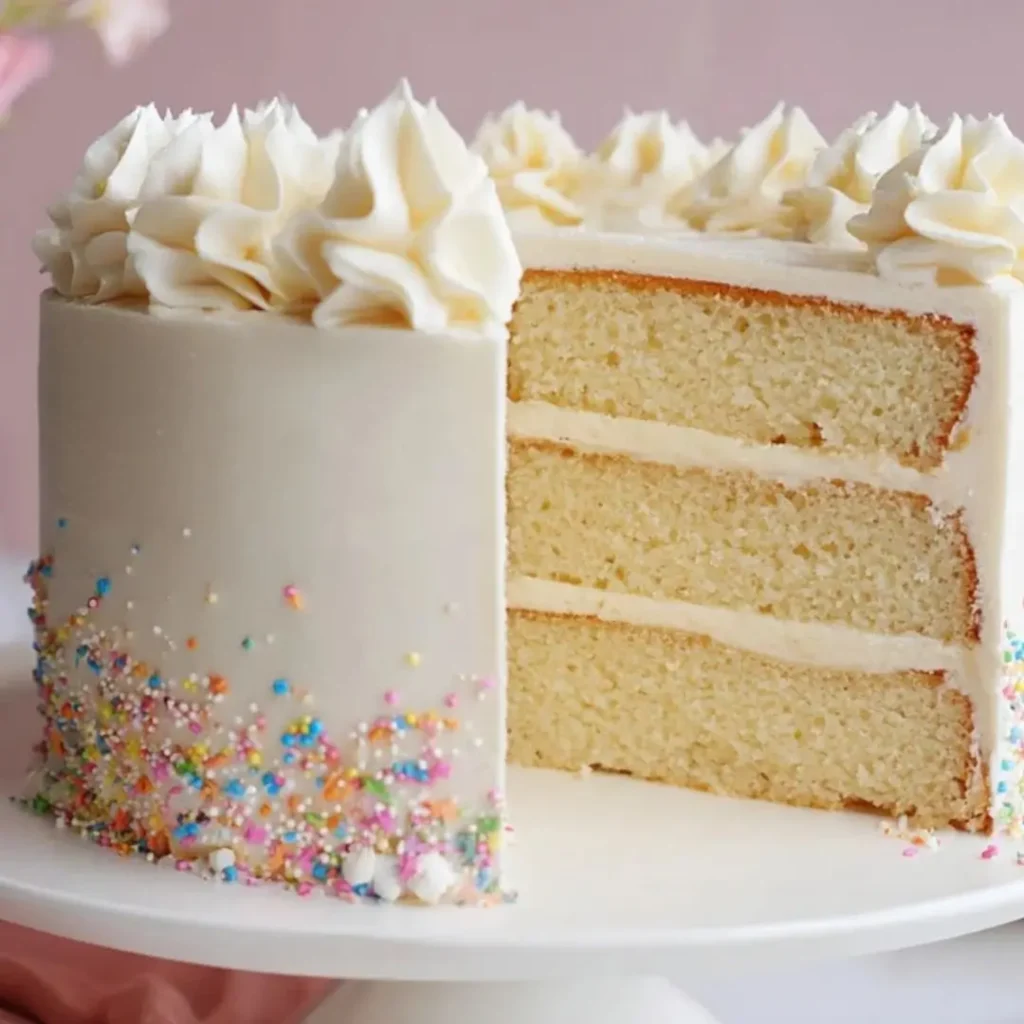
- Once the cakes are completely cool, place one cake layer on your serving plate or cake stand. If desired, you can level the tops of the cakes with a serrated knife for a flatter surface.
- Spread about 1/2 to 3/4 cup of vanilla buttercream evenly over the first cake layer. Carefully place the second cake layer on top.
- Use the remaining buttercream to frost the top and sides of the entire cake. Decorate as desired.
Notes
Pro Tips for Making This vanilla cake
Making a truly exceptional vanilla cake isn’t just about following the steps; it’s about a few little tricks I’ve learned over the years that make all the difference.
My Secret Trick: I always make sure my butter and eggs are at room temperature for at least an hour before I start. This helps them emulsify better, creating a smoother batter and a much more tender, consistent crumb in your finished vanilla cake.
Don’t overmix your batter once you add the flour. Gently fold it in until just combined. Overmixing develops the gluten too much, leading to a tough cake, and we want that lovely, fluffy texture!
When making the buttercream, gradually add the powdered sugar, sifting it first if you can. This prevents lumps and ensures a silky-smooth frosting that’s a joy to spread.
For even cake layers, I always weigh my batter and divide it equally between the prepared cake pans. This ensures both layers bake at the same rate and stack beautifully, making assembly a breeze.
Fun Variations for vanilla cake
One of the most delightful things about a classic vanilla cake is how beautifully it adapts to new flavors and personal touches! It’s like a blank canvas waiting for your creative spark.
A Zesty Twist
For a bright and cheerful variation, try adding the zest of one lemon or orange to your cake batter. The citrus notes complement the sweet vanilla perfectly, creating a lighter, more vibrant flavor profile that my sister always loves, especially in spring.
Berry Bliss
Swirl a few tablespoons of your favorite berry jam – raspberry or strawberry works wonderfully – into the batter just before baking. Don’t mix it in completely; just a gentle swirl will create lovely ribbons of fruit throughout your vanilla cake. A friend of mine adores this surprise in every bite!
Chocolate Chip Delight
If you’re a chocolate lover like me, fold in about half a cup of mini chocolate chips into the batter. It’s a simple addition that makes this classic treat even more comforting and kid-friendly.
What to Serve With vanilla cake
This humble vanilla cake is so versatile, it truly shines with a variety of accompaniments, making it perfect for any occasion!
I love serving a slice with a generous scoop of homemade vanilla bean ice cream or a dollop of freshly whipped cream. The creamy, cool contrast is just heavenly against the fluffy cake. My mom always pairs it with a steaming mug of hot cocoa on a chilly evening, which is pure comfort.
For a lighter touch, fresh berries like strawberries, raspberries, or blueberries are fantastic. Their slight tartness cuts through the sweetness beautifully. A quick drizzle of warm caramel sauce also elevates this delightful vanilla cake to an even more decadent dessert in moments!
How to Store vanilla cake
Keeping your leftover vanilla cake fresh is key to enjoying its deliciousness for days, and I’ve got some simple tricks to help you do just that!
Fridge Storage
To keep your vanilla cake moist and flavorful, store it in an airtight cake dome or container at room temperature for up to 2-3 days. If it’s a very warm day or if your buttercream contains fresh cream, I recommend refrigerating it. Just bring it back to room temperature for about 30 minutes before serving for the best texture.
Freezer Tips
For longer storage, individual slices or even whole undecorated layers of vanilla cake can be frozen. Wrap them tightly in plastic wrap, then a layer of aluminum foil, and place in a freezer-safe bag for up to 2 months. My personal tip: a light dusting of powdered sugar on a thawed slice makes it feel freshly baked!
Nutritional Benefits
While this delicious vanilla cake is certainly a treat, it brings a moment of pure joy and satisfaction, which I believe is nourishing in its own way! Made with wholesome ingredients like real butter and eggs, it’s a delightful dessert that satisfies the soul and celebrates the simple pleasure of a homemade sweet.
FAQs
Faq 1
Can I make this cake ahead of time?
Absolutely! You can bake the vanilla cake layers a day in advance, wrap them tightly, and store them at room temperature. The buttercream can also be made ahead and kept in the fridge, then re-whipped before assembly.
Faq 2
Why is my vanilla cake dry?
A dry vanilla cake often results from overbaking or using too much flour. Always measure your flour accurately, preferably by weight, and keep an eye on your oven. Bake until a toothpick inserted comes out with moist crumbs, not wet batter.
Faq 3
Can I use oil instead of butter?
While you technically can, I strongly recommend sticking with butter for this vanilla cake. Butter provides a much richer flavor and contributes significantly to the cake’s tender, delicate crumb that makes it so classic and delicious.
Faq 4
How do I get a perfectly flat cake top?
For flatter cake tops on your vanilla cake, you can use baking strips around your cake pans, which help the edges bake slower. Alternatively, you can level the cooled cake layers with a serrated knife before frosting for a neat stack.
Conclusion
Baking this classic homemade vanilla cake is more than just following a recipe; it’s an invitation to create warmth, gather loved ones, and make memories that will be cherished for years to come. I truly hope this recipe inspires you to embrace the joy of baking and experience the sheer delight of a tender, fluffy vanilla cake. With a little love and patience, you’re not just baking a dessert, you’re crafting a sweet story. Happy baking, my dear friends!