
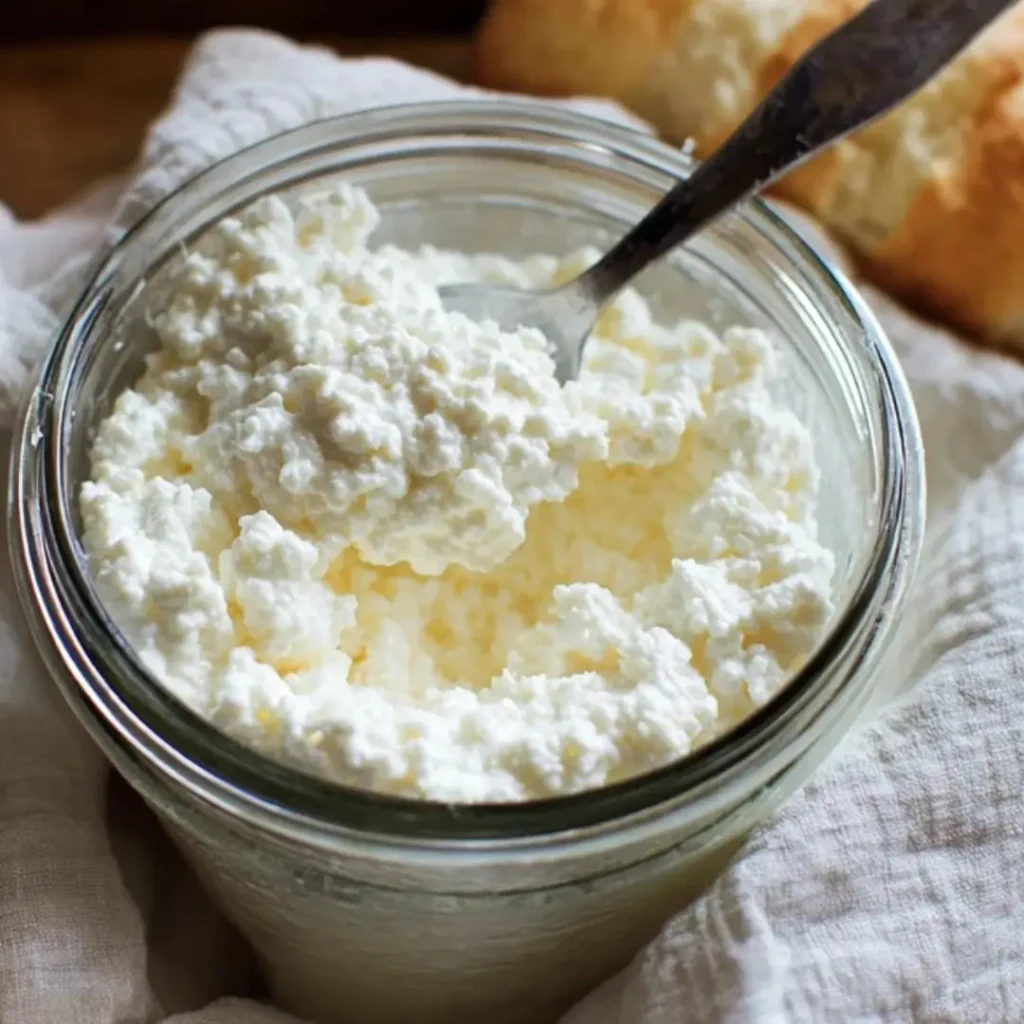
Oh, darling bakers, there’s nothing quite like the simple pleasure of a truly fresh ingredient, especially when you’ve made it yourself right in your own kitchen. And when it comes to a star player like Homemade Ricotta Cheese, the creamy texture and delicate, milky flavor are simply beyond compare. It transforms any dish, whether sweet or savory, into something truly special and adds a touch of rustic elegance that store-bought just can’t match.
I remember my grandmother, Nonna Clara, always saying that the best meals started with the freshest components. She didn’t make ricotta often, but when she did, the whole kitchen would buzz with anticipation. The way the milk slowly transformed, thickening into those beautiful, tender curds, felt like pure magic. It’s a joy I’ve carried with me, always finding delight in transforming humble ingredients into something extraordinary.
Making your own Homemade Ricotta Cheese is surprisingly easy, wonderfully rewarding, and a fantastic way to elevate your cooking and baking to a new level. It’s a foundational ingredient that brings a comforting, wholesome richness to so many recipes, perfect for impressing guests or simply treating your family to something truly delicious. My top tip? Don’t rush the draining process – good things come to those who wait!
What You Need to Make This Recipe
Crafting luscious, creamy homemade ricotta cheese begins with just a few pure ingredients: whole milk, heavy cream, a touch of fine sea salt, and either fresh lemon juice or white vinegar to work its magic. I always choose the freshest dairy I can find, as the quality truly shines through in this simple preparation. You’ll find the full list of ingredients and precise measurements in the recipe card below.
How to Make Homemade Ricotta Cheese
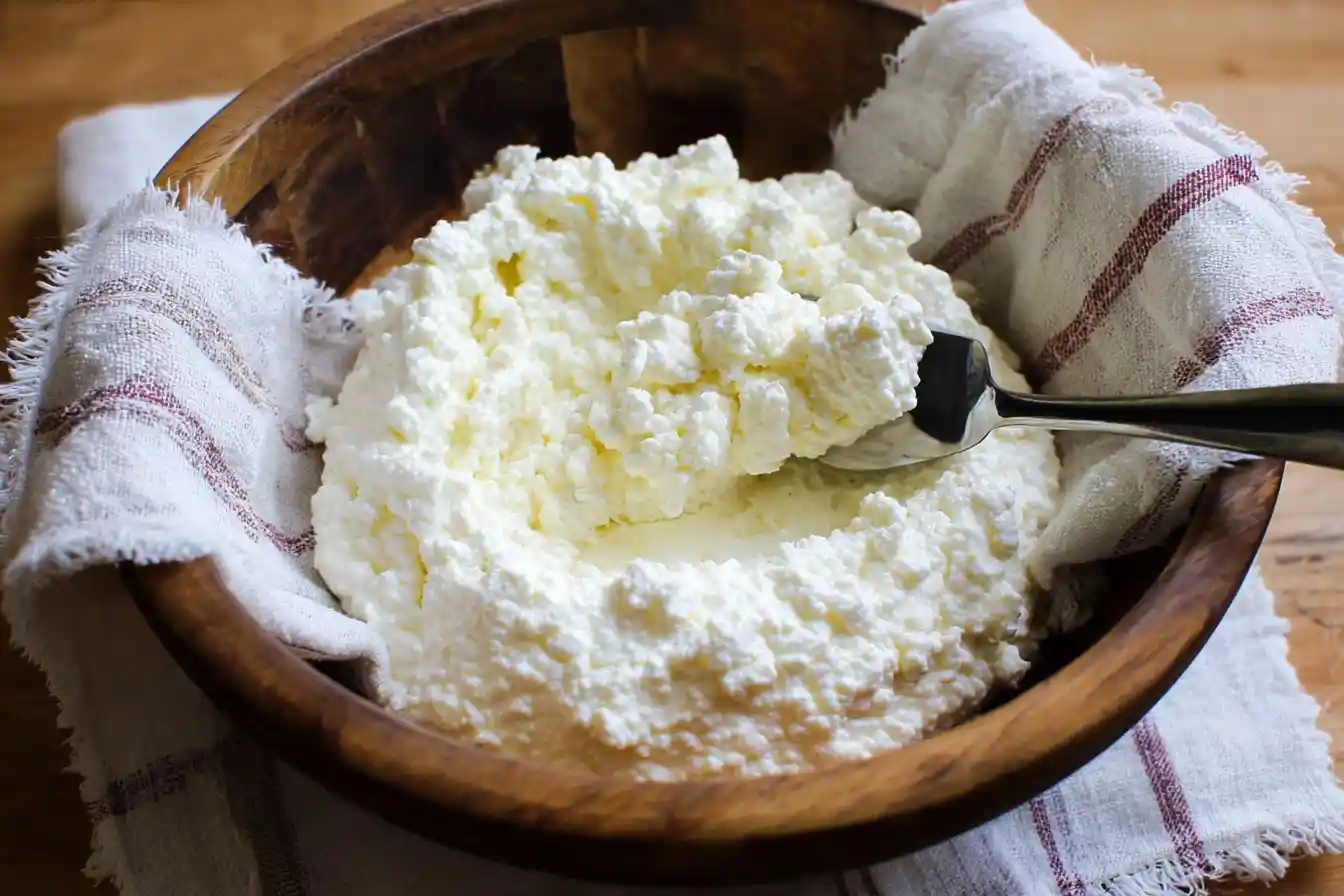
Making Homemade Ricotta Cheese might sound like a chef’s secret, but I promise you, it’s incredibly approachable. You’ll gently heat a mixture of whole milk and cream, coaxing it to a simmer before adding an acid like lemon juice or vinegar, which beautifully separates the curds from the whey. A little patience as it drains, and you’ll have a wonderfully fresh, creamy batch ready to enjoy!
Creamy Homemade Ricotta Cheese
Ingredients
Equipment
Method
- Line a fine-mesh sieve with 2-3 layers of cheesecloth, making sure there’s enough overhang to gather later. Place the sieve over a large bowl to collect the whey.
- In a large, heavy-bottomed pot, combine the whole milk, heavy cream (if using), and salt. Stir gently to combine.
- Heat the milk mixture over medium-high heat, stirring occasionally to prevent scorching on the bottom. Continue heating until it reaches a temperature of 195-200°F (90-93°C). It should be steaming heavily and just beginning to show small bubbles around the edges, but do not let it come to a rolling boil.
- Remove the pot from the heat. Gently pour in the lemon juice or white vinegar, stirring just once or twice to incorporate. Let the mixture sit undisturbed for 10-15 minutes. During this time, the milk solids (curds) will visibly separate from the greenish-yellow liquid (whey).
- Using a slotted spoon, carefully scoop the curds from the pot and transfer them to the prepared cheesecloth-lined sieve. Try to get as much of the solid curds as possible, leaving the whey behind.
- Let the ricotta drain in the sieve for 15-30 minutes, or longer if you prefer a drier, firmer ricotta. The longer it drains, the thicker it will become. For a creamier, softer texture, drain for less time.
- Transfer the fresh ricotta to an airtight container. Use immediately or refrigerate. Enjoy your homemade ricotta!
Notes
Acid Choice: Both lemon juice and white vinegar work well. Lemon juice imparts a very subtle, fresh tang, while vinegar is more neutral.
Yield Variation: The amount of ricotta you get will vary slightly depending on the milk’s fat content and how long you drain it.
Storage: Homemade ricotta can be stored in an airtight container in the refrigerator for up to 3-4 days.
Using Whey: Don’t discard the whey! It’s nutritious and can be used in baking (replacing water in bread recipes), smoothies, or as a liquid for cooking grains.
Pro Tips for Making This Homemade Ricotta Cheese
Over the years, I’ve learned a few tricks that truly elevate a simple recipe, and making Homemade Ricotta Cheese is no exception. Here are my tried-and-true secrets for the best results:
My top tip for velvety smooth ricotta is to ensure you don’t overheat the milk and cream mixture initially. A gentle simmer is key – you want those tiny bubbles around the edge, not a rolling boil. This keeps the milk from scorching and ensures a delicate curd.
My Secret Trick: I always line my colander with a double layer of good quality cheesecloth. This ensures a finer, smoother drain and prevents any tiny curds from slipping through, resulting in a beautifully consistent texture for your Homemade Ricotta Cheese.
Don’t be afraid to experiment with the draining time. For a firmer, drier ricotta (perfect for baking), let it drain longer, even up to an hour or more. For a creamier, softer texture (ideal for spreading or dolloping), drain for just 20-30 minutes.
Always use fresh lemon juice or good quality white vinegar. The acid is what helps the milk curdle, and fresh ingredients make all the difference in flavor and effectiveness. It’s a small detail that yields significant results.
Fun Variations for Homemade Ricotta Cheese
One of the greatest joys of making Homemade Ricotta Cheese is how wonderfully versatile it is. You can easily adapt it to suit your mood or the season!
- Sweet Citrus Swirl: For a bright, zesty twist, I sometimes stir in a teaspoon of finely grated lemon or orange zest right after draining. My sister always asks me to swirl in a touch of honey or maple syrup too for a delightful morning treat.
- Herbal Infusion: If you’re leaning savory, consider steeping a sprig of fresh rosemary or thyme in the milk and cream mixture as it heats. Just remove the herbs before adding your lemon juice or vinegar for a subtle, aromatic flavor.
- Spicy Kick: For those who love a bit of heat, try mixing in a pinch of red pepper flakes and a whisper of garlic powder. This is fantastic as a spread on warm crusty bread.
- Sweet & Fruity: A friend loves when I fold in a few tablespoons of finely diced dried cranberries or chopped pistachios for added texture and a burst of color.
What to Serve With Homemade Ricotta Cheese
Once you’ve made your own Homemade Ricotta Cheese, you’ll find it’s a star in so many dishes, both sweet and savory. It’s truly a blank canvas for deliciousness!
I love serving a dollop of fresh Homemade Ricotta Cheese with a drizzle of good quality honey and some fresh berries – it’s a simple, elegant dessert that feels incredibly luxurious. My mom always pairs it with a steaming cup of herbal tea for an afternoon pick-me-up.
For a savory touch, spread it generously on toasted baguette slices, top with a sprinkle of flaky sea salt, black pepper, and perhaps a chiffonade of fresh basil. It’s also divine stirred into pasta sauces or used as a creamy filling for lasagna. And for a super quick idea, just a spoonful on a piece of avocado toast is surprisingly delightful.
How to Store Homemade Ricotta Cheese
After all your love and effort in creating delicious Homemade Ricotta Cheese, you’ll want to make sure it stays fresh and flavorful for as long as possible.
To store leftover ricotta, transfer it to an airtight container and keep it in the refrigerator. It will typically stay fresh for 3-5 days. I always recommend placing a paper towel on top of the ricotta before sealing the container; it helps absorb any excess moisture and keeps it tasting fresher. If you notice any sour smells or discoloration, it’s best to discard it. While you can freeze ricotta, the texture can become a bit grainy upon thawing, so I generally prefer to enjoy it fresh within a few days. If freezing, use it in baked dishes where the texture change won’t be as noticeable.
Nutritional Benefits
While we bakers love a good indulgence, it’s always lovely when a treat offers a little wholesome goodness too! This Homemade Ricotta Cheese is a wonderful source of protein, helping you feel satisfied. Made with simple, fresh dairy, it’s a delightful way to enjoy a comforting treat that’s both satisfying and nourishing, embodying my philosophy of simple, quality ingredients.
FAQs
Faq 1
Can I use low-fat milk for homemade ricotta?
I always recommend whole milk and heavy cream for the creamiest Homemade Ricotta Cheese. Low-fat milk might yield fewer curds and a drier texture, as fat content is key for richness and a good yield.
Faq 2
What if my ricotta doesn’t curdle?
If your milk isn’t curdling, it usually means it wasn’t quite hot enough or you didn’t add enough acid. Gently increase the heat and, if needed, add another teaspoon of lemon juice or vinegar, stirring gently.
Faq 3
How long does homemade ricotta last?
Properly stored in an airtight container in the refrigerator, your delicious Homemade Ricotta Cheese will typically stay fresh for 3 to 5 days. Always check for freshness before using.
Faq 4
Can I use a different acid?
Yes, absolutely! While lemon juice and white vinegar are common, you can also use citric acid dissolved in a little water. Just ensure the acid you choose is food-grade and won’t impart an unwanted flavor to your creamy Homemade Ricotta Cheese.

Conclusion
Making your own Homemade Ricotta Cheese is truly one of those kitchen triumphs that feels incredibly rewarding. It’s a simple process that yields a remarkably fresh, creamy, and versatile ingredient, perfect for everything from sweet desserts to savory pasta dishes. Embrace the joy of transforming humble milk into this magical cheese, and you’ll create not just a delicious ingredient, but a beautiful memory in your kitchen. Happy baking, sweet friends!