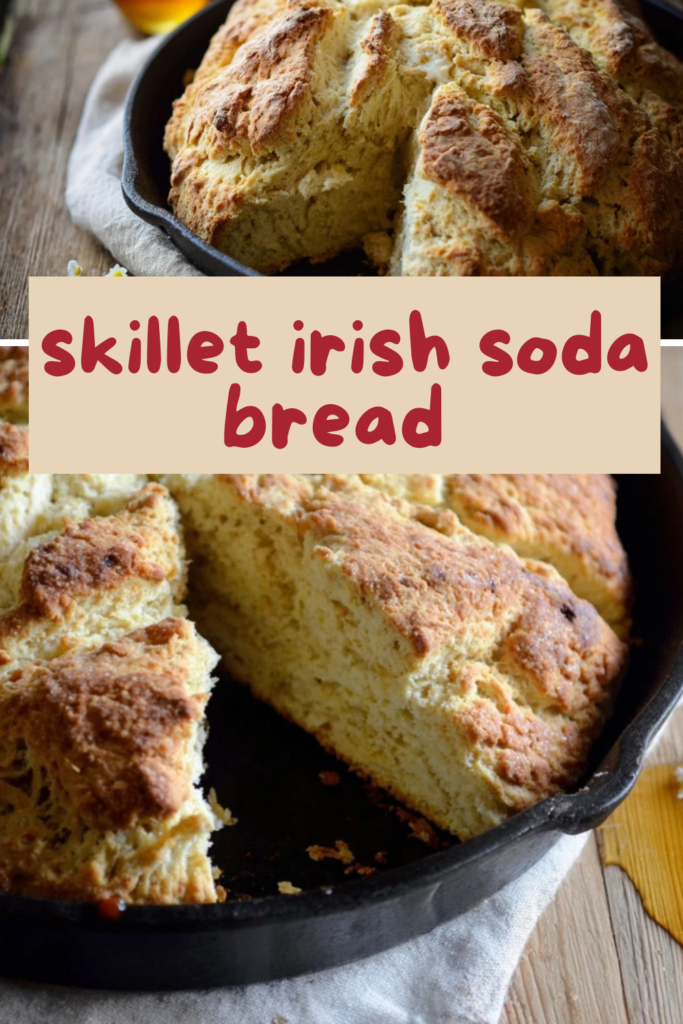
Oh, the comforting aroma of freshly baked bread! There’s something truly magical about bringing a simple dough to life, especially when it’s something as wonderfully rustic as skillet Irish soda bread. This delightful bread, with its tender crumb and gloriously buttery crust, conjures up images of cozy kitchens and heartwarming meals. It’s the kind of bread that whispers stories of tradition and simple pleasures, and it’s surprisingly easy to achieve right in your own kitchen.
I remember my grandmother, bless her heart, teaching me the rhythm of baking. Her hands, dusted with flour, moved with a practiced grace as she transformed everyday ingredients into something extraordinary. This rustic skillet Irish soda bread reminds me so much of those cherished afternoons, a testament to how even the most humble recipes can create the most beautiful memories. It’s a joy I still feel every time I pull a warm loaf from the oven.
This recipe is a true gem, offering the perfect blend of ease and deeply satisfying flavor. It’s ideal for busy weeknights when you crave homemade goodness without the fuss, and it’s a family-friendly treat that everyone will adore. My top tip? Always bake with a happy heart; it truly makes all the difference!
What You Need to Make This Recipe
Crafting this delightful bread requires just a few pantry staples that, when combined, create pure magic. The rich, tangy buttermilk is key to its tender texture, while a touch of sugar balances the traditional savory notes. And of course, for a truly irresistible skillet Irish soda bread, you can’t forget the unsalted butter for that incredible golden crust! You’ll find the full list of ingredients and precise measurements in the recipe card below.
How to Make skillet irish soda bread
Whipping up this bread is a wonderfully straightforward process, making it perfect for bakers of all levels. We’ll begin by whisking together the dry ingredients, ensuring everything is evenly distributed for a consistent bake. Then, the wet ingredients are gently folded in to form a soft dough, which is then pressed into a warm skillet before baking to golden perfection. It’s a simple dance of ingredients that results in a truly comforting skillet Irish soda bread.
Rustic Skillet Irish Soda Bread
Ingredients
Equipment
Method
- Preheat your oven to 400°F (200°C). Place the 10-inch cast iron skillet in the oven while it preheats. This helps create a crispy bottom crust.
- In a large mixing bowl, whisk together the flour, baking soda, salt, and granulated sugar (if using). If adding raisins, stir them in now, ensuring they are evenly distributed.
- Make a well in the center of the dry ingredients. Pour in the cold buttermilk. Use a wooden spoon or a sturdy spatula to gently mix until just combined. The dough will be shaggy and sticky; avoid overmixing, as this can lead to a tough bread.
- Turn the dough out onto a lightly floured surface. Knead briefly, just enough to bring it together into a round, slightly flattened loaf, about 1-2 minutes. Do not overwork the dough.
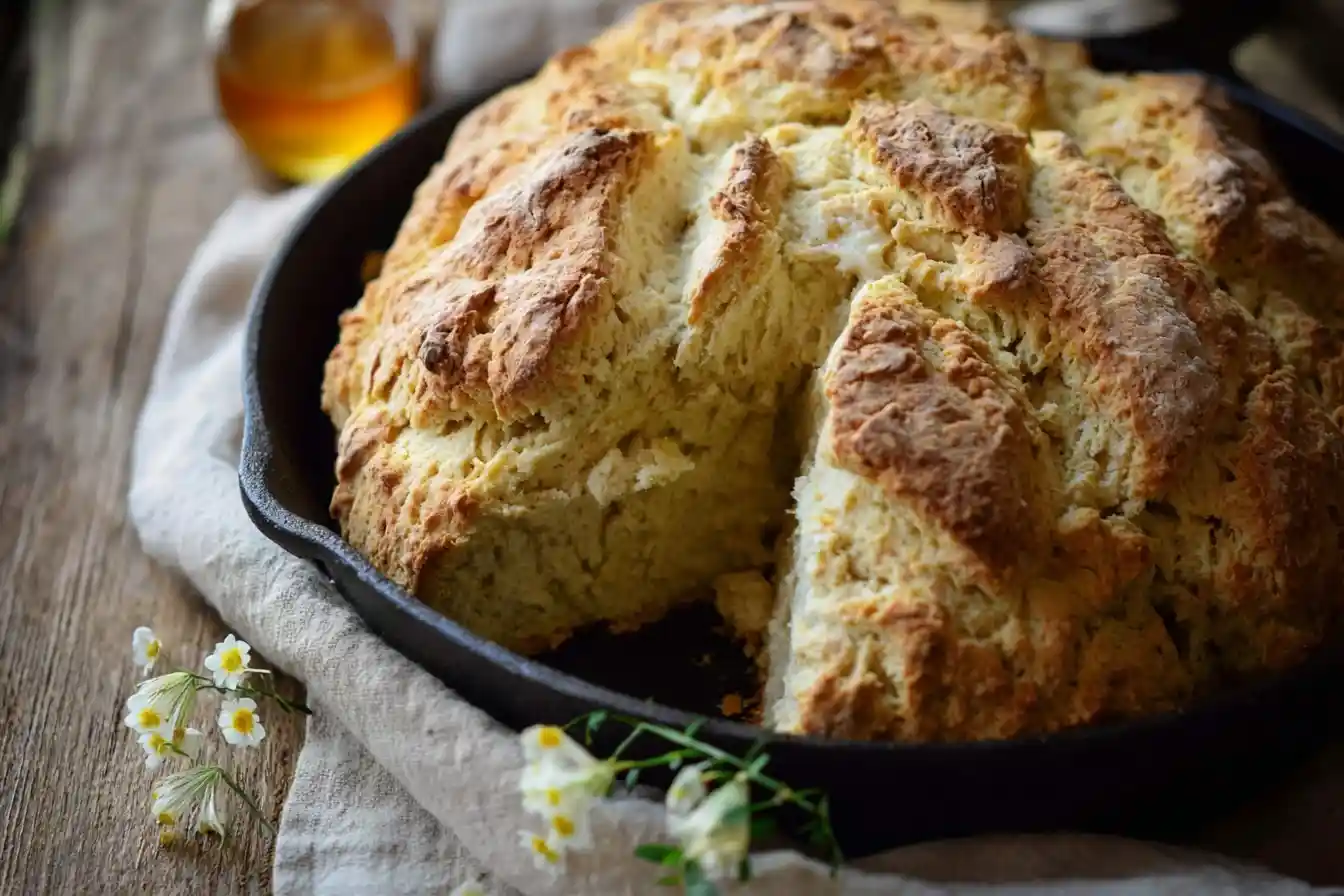
- Carefully remove the hot cast iron skillet from the oven using oven mitts. Add 1-2 tablespoons of melted butter to the hot skillet and swirl to coat the bottom and sides. Place the dough ball into the hot, buttered skillet. Using a sharp knife, score a deep “X” into the top of the bread, extending almost to the edges and about halfway through the dough’s thickness. This helps the bread cook evenly and is traditional.
- Transfer the skillet with the bread immediately back into the preheated oven. Bake for 35-45 minutes, or until the crust is golden brown and a wooden skewer or toothpick inserted into the center comes out clean. If the top browns too quickly, you can loosely tent it with foil.
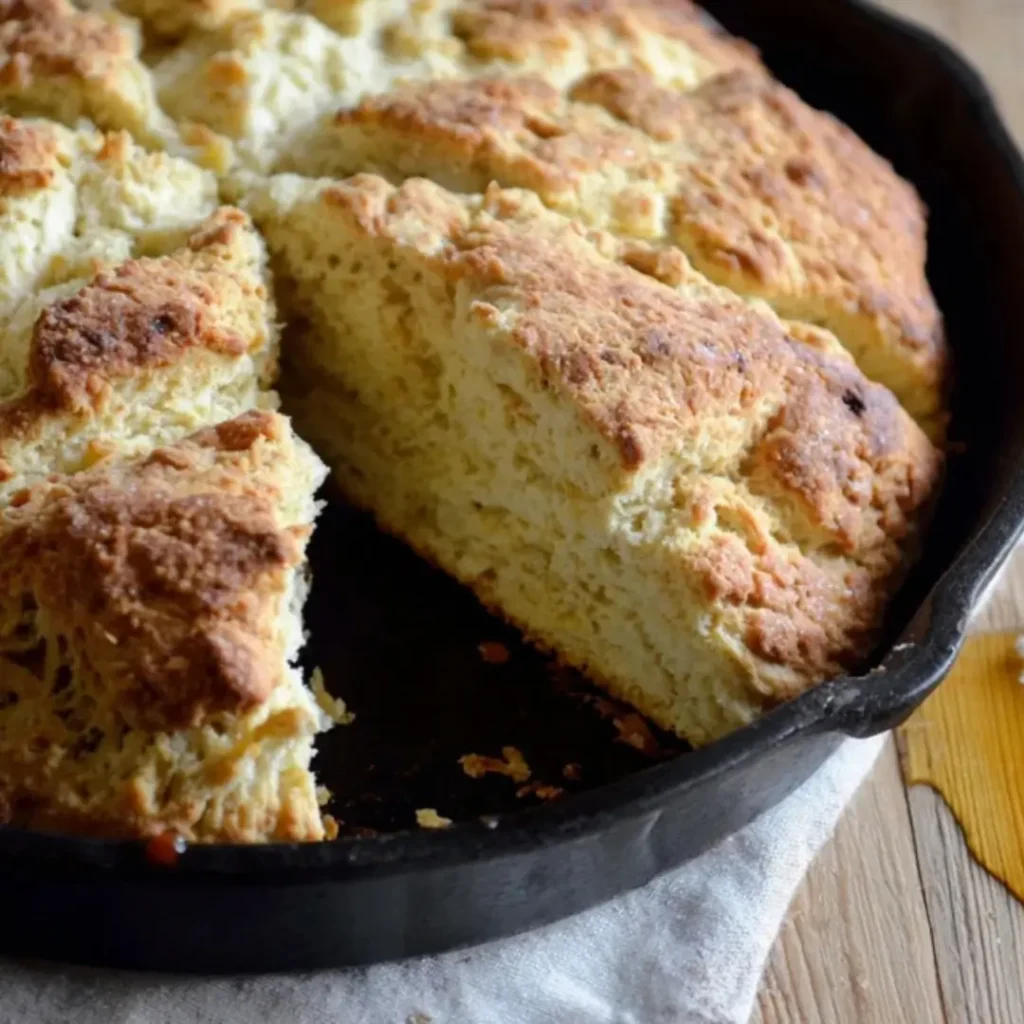
- Once baked, remove the skillet from the oven. For a softer crust, immediately transfer the bread to a wire rack to cool. For a crispier crust, let it cool in the skillet for 10-15 minutes before transferring to a wire rack.
- Slice and serve warm with butter, jam, or alongside a hearty stew.
Notes
Buttermilk Substitute: If you don’t have buttermilk, you can make your own by adding 1 tablespoon of white vinegar or lemon juice to a measuring cup, then filling the rest with regular milk (any fat content) up to the 1 3/4 cup line. Let it sit for 5-10 minutes until it slightly curdles before using.
Variations: For a more savory bread, omit the sugar and raisins, and add 1/2 cup of shredded sharp cheddar cheese or 1 tablespoon of fresh chopped chives.
Storage: Store leftover soda bread at room temperature, wrapped tightly in plastic wrap or foil, for up to 2-3 days. It’s best eaten fresh.
Pro Tips for Making This skillet irish soda bread
Achieving that perfect loaf of skillet Irish soda bread is easier than you think, especially with a few little tricks I’ve picked up over the years. These pointers will help you bake a bread that’s not only delicious but also beautifully textured, just like the ones my grandmother used to make.
My Secret Trick: I always make sure my buttermilk is at room temperature. This helps it combine more easily with the dry ingredients and creates a more tender crumb in your finished bread. It’s a small step, but it truly makes a world of difference for your skillet Irish soda bread!
Another tip I always recommend is to avoid overworking the dough. Irish soda bread is meant to be rustic and quick, so a light touch is key. Just mix until the ingredients are combined, and resist the urge to knead it excessively, as this can lead to a tough loaf.
When preheating your skillet, ensure it’s truly hot before adding the dough. This initial burst of heat helps create that coveted crispy, buttery crust on your skillet Irish soda bread, giving it an extra layer of deliciousness.
Don’t forget to cut a cross into the top of your dough before baking! This traditional step isn’t just for looks; it helps the bread rise evenly and allows the heat to penetrate more thoroughly, ensuring a perfectly cooked center.
Fun Variations for skillet irish soda bread
One of the things I adore about baking is the freedom to get creative and put your own spin on classic recipes. This skillet Irish soda bread is wonderfully adaptable, allowing you to play with flavors and ingredients to suit your mood or what you have in your pantry.
Sweet & Savory Swirls
For a touch of extra sweetness, I often add a handful of dried cranberries along with the raisins. Or, for a savory twist, try incorporating some shredded cheddar cheese and a sprinkle of fresh chives into the dough. My sister always asks me to add a dash of orange zest for a brighter flavor profile, which pairs beautifully with the raisins!
Herbaceous Harmony
Consider adding a tablespoon of finely chopped fresh rosemary or thyme to the dry ingredients. These herbs impart a wonderful aroma and a delicate savory note that complements the rustic nature of the bread perfectly, especially if you’re serving it with a hearty soup or stew.
A Touch of Spice
During the cooler months, I love to add a pinch of cinnamon or nutmeg to the dry ingredients for a hint of warmth. It creates a cozy aroma in the kitchen and gives the skillet Irish soda bread a lovely, subtle spiced flavor that’s just irresistible.
What to Serve With Your Skillet Creation
There’s something incredibly comforting about a warm slice of skillet Irish soda bread, and finding the perfect accompaniment just elevates the experience. Whether you’re enjoying it for breakfast, as a snack, or alongside a meal, these pairings will make your heart sing.
I love serving this bread simply slathered with a generous pat of good quality Irish butter – the flavors just sing together! For breakfast, it’s absolutely divine with a dollop of homemade jam or marmalade and a steaming mug of tea. My mom always pairs it with a hearty bowl of beef stew during colder evenings, and it’s perfect for soaking up all the delicious broth. For a quick treat, just a drizzle of honey or a sprinkle of cinnamon sugar makes this rustic bread feel extra special.
How to Store Your Delicious Bread
Once you’ve baked a wonderful loaf of skillet Irish soda bread, you’ll want to make sure it stays fresh and delicious for as long as possible. Proper storage is key to preserving its lovely texture and flavor, ensuring every slice is as good as the first.
Keeping it Fresh
To keep your leftover bread fresh, I always recommend storing it at room temperature in an airtight container or a tightly sealed plastic bag. This will prevent it from drying out too quickly. It’s usually best enjoyed within 2-3 days. If you find it’s a little dry, a quick warm-up in the oven or microwave can bring back some of its tenderness.
Freezing for Later
If you’d like to enjoy your homemade bread for longer, it freezes beautifully! Once completely cooled, wrap the entire loaf or individual slices tightly in plastic wrap, then place in a freezer-safe bag. It can be stored in the freezer for up to 3 months. When you’re ready to enjoy, simply thaw at room temperature and warm gently in the oven. My personal tip? A light dusting of powdered sugar after reheating brings it back to life, especially if you’re serving it with something sweet.
Nutritional Benefits
While our focus is always on the joy of baking and delicious flavors, it’s lovely to know that this skillet Irish soda bread also offers some wholesome goodness. Made with simple, honest ingredients like all-purpose flour and buttermilk, it provides a comforting treat that’s both satisfying and nourishing. The raisins also contribute natural sweetness and a touch of fiber, making it a wonderful way to enjoy a homemade delight.
FAQs
Can I make this bread without buttermilk?
While buttermilk is traditional and highly recommended for its tenderizing qualities, you can make a substitute. Combine regular milk with a tablespoon of lemon juice or white vinegar and let it sit for 5 minutes before using in your skillet Irish soda bread.
Why did my bread come out dense?
A dense skillet Irish soda bread is often caused by overworking the dough. Remember to mix gently until just combined. Over-mixing develops gluten, leading to a tougher texture. Ensure your baking soda is fresh, too!
Can I add other dried fruits to this recipe?
Absolutely! Dried cranberries, currants, or even chopped dried apricots would be lovely additions to your skillet Irish soda bread. Just ensure the total quantity of dried fruit remains similar to the recipe’s recommendation for raisins.
How do I get a really golden, buttery crust?
To achieve that beautiful golden, buttery crust on your skillet Irish soda bread, ensure your cast iron skillet is properly preheated before adding the dough. You can also brush the top with a little extra melted butter before baking.
Conclusion
There you have it, my friends – the simple joy of baking a delicious skillet Irish soda bread with a beautifully buttery crust. It’s more than just a recipe; it’s an invitation to slow down, savor the process, and create something truly special with your own hands. This comforting bread embodies everything I love about home baking: approachable, rewarding, and brimming with the kind of warmth that brings people together. So, gather your ingredients, put on your apron, and let’s create some sweet memories, one glorious loaf at a time! Happy baking!